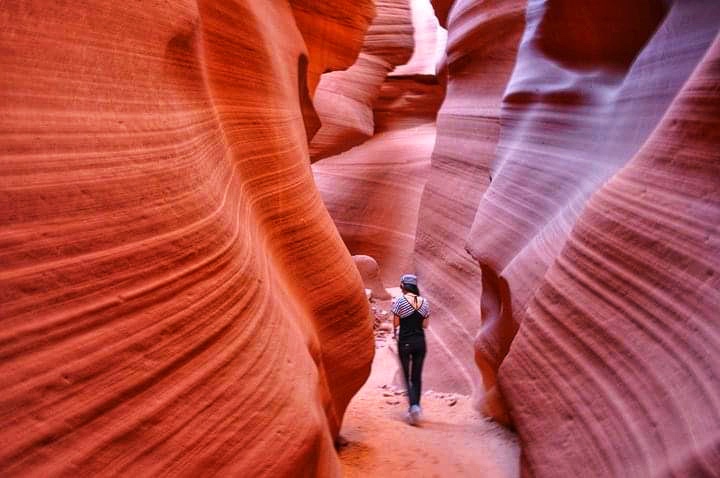
Grand Canyon Itinerary - A Travel Guide Blog

Grand Canyon South Rim Itinerary: A Travel Guide Blog

posted in: United States | 0

Last updated on December 22nd, 2024

Planning on things to do for the Grand Canyon itinerary? We’ll share the Grand Canyon travel blog with information on how to visit Grand Canyon South Rim in this detailed travel guide to help you with the planning.

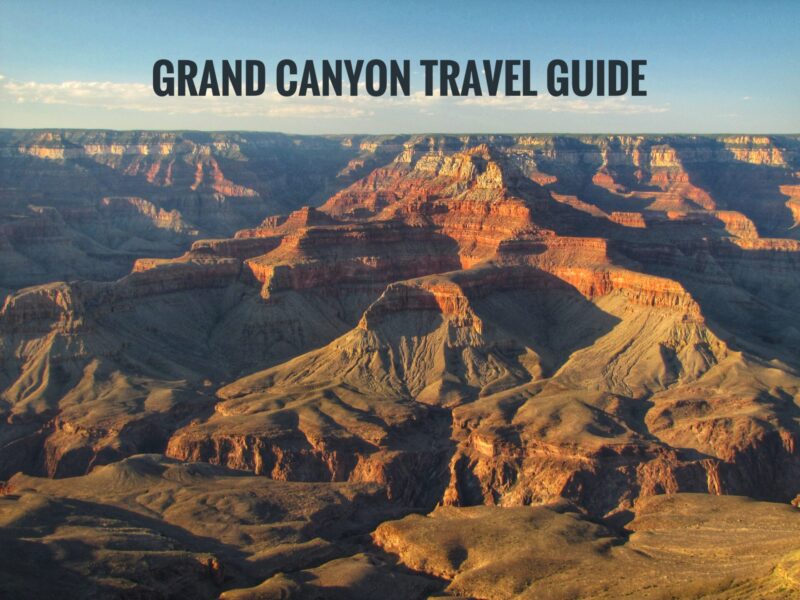
A trip to Grand Canyon South Rim has great views of the canyon. Words cannot describe the absolute immense beauty of this place. You can walk along the rim, take a short hike, or go to the various viewpoints to immerse in the beauty of the canyon. We enjoyed our Grand Canyon experience! There are so many awesome spots to see and explore in the park. Trust us, Grand Canyon is one place you don’t want to sleep on.

For those of you planning your trip to the Grand Canyon, it’s important to plan your itinerary before your trip. That way, you can prepare in advance and make the most of your Grand Canyon trip.

Here, we wanted to share our Grand Canyon South Rim itinerary and detailed travel guide. In this Grand Canyon travel blog, we’ll include all the useful information and tips, including the best things to do and what to see in Canyon. Take a look!

Grand Canyon National Park, Arizona
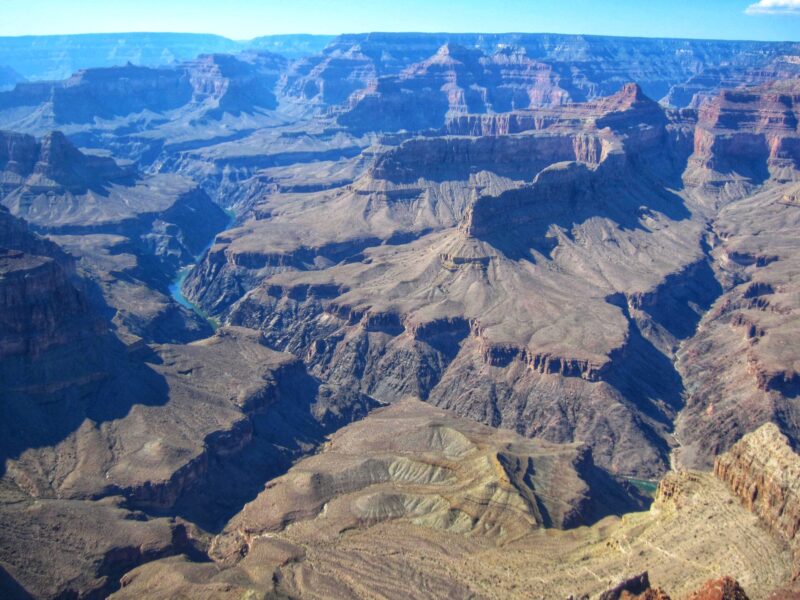
Grand Canyon Travel Guide Blog

Located in Arizona, Grand Canyon National Park is a truly magnificent place to visit. This awe-inspiring landscape is carved by the Colorado River and layered bands of colorful rock formation millions of years. It is one of the Seven Natural Wonder in the World and UNESCO Heritage Site. Besides, Grand Canyon is one of the most popular destinations in the world, which makes it also one of the busiest National Park in the USA. 

We recommended Grand Canyon South Rim as it has a more scenic side and perfect place to begin your explanation of the Grand Canyon. It is dubbed the “true Grand Canyon” and is open 24 hours with a number of lodging choices, restaurants, shops, and facilities. While the North Rim is closed during the winter due to snow.

Grand Canyon National Park
State: Arizona
Address: S Entrance Rd, Grand Canyon Village, AZ 86023
Area: 1,218,375 acres
Telephone: (928) 638-7888
Official Website: https://www.nps.gov/grca/index.htm

Entrance Fee To Grand Canyon NP

The entrance fee to Grand Canyon National Park is $35 USD per car and it covers up to 4 people in 1 vehicle for 7 days entrance in and out of the park. But if you plan to visit more than 3 USA National Parks within the year, we highly recommend you purchase an America The Beautiful pass. This pass grants you free admission to the National Parks and it definitely will save you a lot of money.

Here is some of the quick information for your Grand Canyon South Rim itinerary:

How Many Days for Grand Canyon South Rim?

It depends on what you want to see and do in Grand Canyon. One to two days is a perfect amount of time for a glimpse and introduction to this magnificent site. We recommend at least one full day at the Grand Canyon South Rim but this natural beauty can be visited for days and even weeks.

What to do in Grand Canyon South Rim for a few hours?

It is doable for a visit even you only have a few hours to spend in Grand Canyon. We recommended stopping by a few viewpoints to immerse the view of the Grand Canyon.

What to do in Grand Canyon South Rim in 1 day?

With one day at the Grand Canyon South Rim, you can visit a few viewpoints, take a short hike into the canyon, or watch the sunrise or sunset for the Canyon.

Is Grand Canyon worth a visit?

Definitely Yes! It is one of the most beautiful parks in the world and it worth spending time for a visit even if you just have limited time.

Best Time To Visit Grand Canyon

Grand Canyon South Rim is open all year round while the North Rim is closed during winter. The best time to visit Grand Canyon is during spring and fall when the weather is pleasant and less crowded.

While the Summer months will be the peak season for Grand Canyon, so please expect more crowds. The weather is hot and hiking can be challenging in the middle of the day. Please take more caution on the hot weather if you are planning to visit Grand Canyon in Summer.

Winter will be less crowded compared with spring and fall. Snow is possible and the weather is extremely low. But this also means quieter viewpoints and less expensive accommodation. 

Where To Stay

There are two options if you are looking for accommodation when visiting Grand Canyon, which is within the park and outside the park. If you plan for the sunrise, the best way probably is to stay close by so you can catch the sunrise in the early morning.
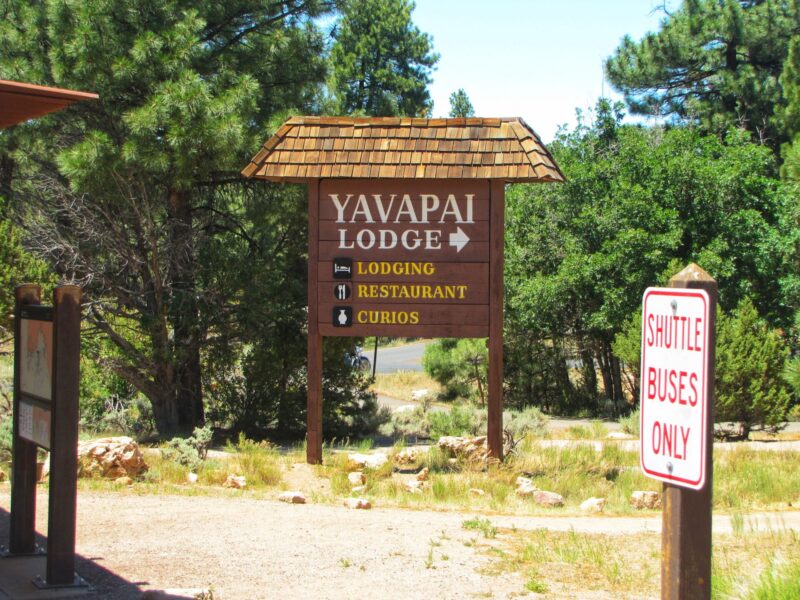
Where to Stay in Grand Canyon - Yavapai Lodge

Best Place to Stay within Grand Canyon

Staying within the Grand Canyon National Park will save you a lot of traveling time by driving in and out. You can also be camping and Grand Canyon with 3 campgrounds (Desert View, Trailer Village, and Mather) in the park. There are several accommodation options for in-park accommodation:

  • The historic El Tovar Hotel – The most premium accommodation option in Grand Canyon South Rim. It is a National Historic Landmark with 78 unique rooms and a fine dining restaurant.
  • Yavapai Lodge – There are 378 rooms for a regular basic stay in Grand Canyon. A great option for family travelers and is located slightly further far compared with other in-park lodges. Check prices now!
  • Bright Angel Lodge is often one of the cheapest options within the park. The lodge offers rooms and cabins and is located on the rim at the top of the Bright Angel trailhead. Check prices now!
  • Maswik Lodge has 280 contemporary-style rooms across 12 buildings.
  • Thunderbird Lodge featured with many of the rooms offers partial views of the canyon.
  • Kachina Lodge offers regular-style hotel rooms and it is clean and comfortable.

Best Place to Stay Outside of Grand Canyon

Another great option for where to stay when visiting Grand Canyon is outside the park. You can plan to stay in a nearby town such as Tusayan. Here is our recommendation:

  • Best Western Squire Inn is featured a lot of amenities and complimentary coffee in the morning. It took about an hour of drive to the entrance of the Grand Canyon. It is a very popular option accommodation option for those who plan to stay closer to the Grand Canyon entrance. Check for room availability here!
  • The Grand Hotel at the Grand Canyon is another popular pick. The hotel is located at Tusayan and about 1 mile from the South Entrance. The rooms are clean and quiet. An ideal for those who need a good rest after a tiring trip to Grand Canyon. Check prices now!

Grand Canyon Travel Tips: Accommodation is limited and the In-park hotels in Grand Canyon Village are extremely popular, especially during summer. So, book ahead of time to secure your stay. You can click on either of the hotels above to check on the prices and room availability.

Getting Around in Grand Canyon South Rim
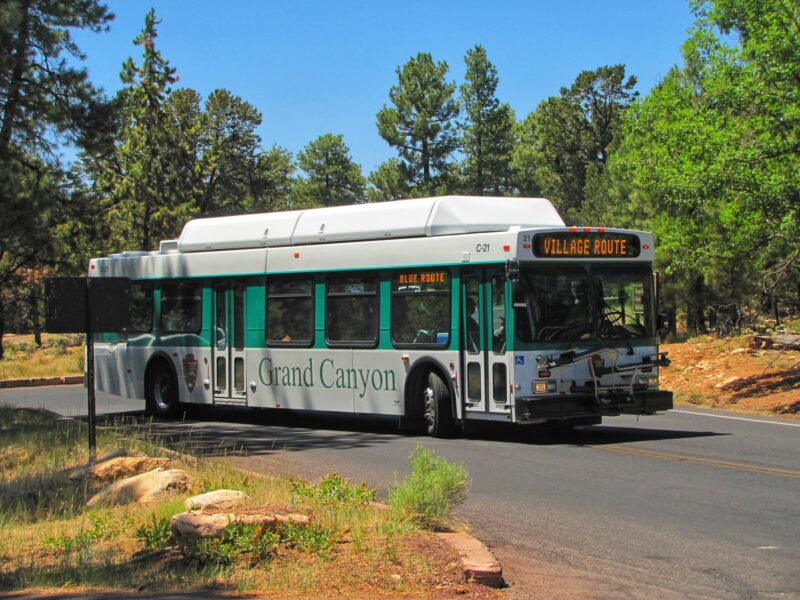
Grand Canyon Travel Guide - Shuttle Service

Driving in the Canyon: Self-driving definitely gives you the most flexibility. Viewpoints of Grand Canyon like Lipan and Moran are accessible by car all year-round.

Free Shuttle Bus Service: Grand Canyon National Park provides a free shuttle bus service at the Southern Rim. There are 5 shuttle bus routes (only 3 routes during winter) are in operation. The bus makes multiple stops where you are able to get off and on. It is advisable that you get a map and carefully plan out which viewpoints are you gonna stop at. The wait between buses is about 15-20 minutes, giving visitors the perfect amount of time to admire the view, take pictures, and then take the next bus.

Helicopter Tour: If you’re the adventurous type, you can also take a helicopter ride over the canyon. It certainly is a cool once-in-a-lifetime moment flying above the canyon, but most likely also the most expensive activity around. You can check around the price here: Grand Canyon Tour with Helicopter

Grand Canyon Itinerary

The Southern Rim is easily accessible from Las Vegas, or from nearby cities like Flagstaff and Page. All are the perfect places to begin your adventure in the Grand Canyon. Very easy to do.

The day before, we drove from Las Angelos to Las Vegas with a rental car and spent the night there. The next morning, we continue our journey and headed to Grand Canyon. A 5-hour drive from Las Vegas put us in the South Rim entrance of the Grand Canyon.
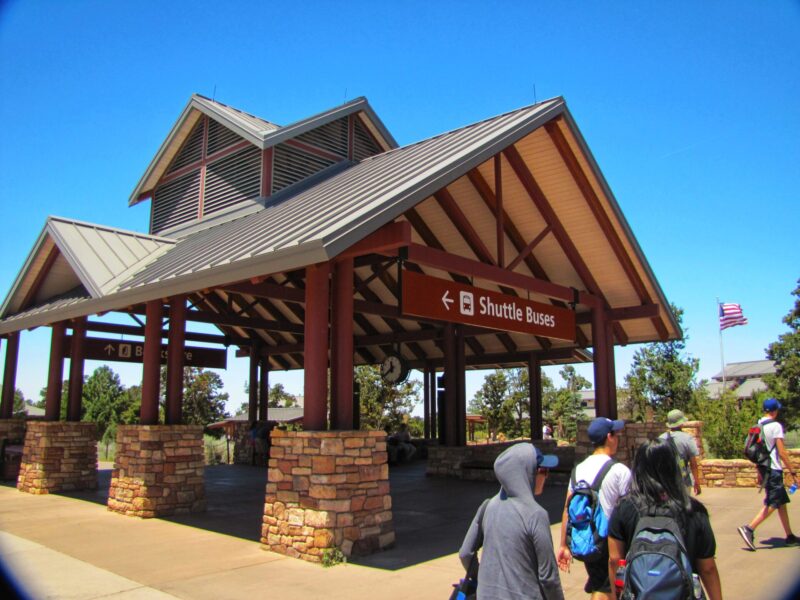
Getting Around in Grand Canyon South Rim

At the Grand Canyon National Park, we took the shuttle option and hopped around to different viewpoints to have a different view of this natural wonder. The view was just amazing and immense! One of the must-visit National Park in the USA for sure!

There are dozen of viewpoints in the Grand Canyon and offer spectacular views of the canyon. Below are our picks and how we spend our time in the 1-Day Grand Canyon South Rim itinerary:

  • Arrived at Grand Canyon South Rim Entrance Point from Las Vegas.
  • Grand Canyon Visitor Center.
  • Mather Point.
  • Yavapai Point.
  • Hermit’s Rest Viewpoints (Trailview Overlook, Maricopa Point, Powell Point, Hopi Point, Mohave Point, The Abyss, Monument Creek Vista, Pima Point, and Hermits Rest).
  • Kaibab Rim Route: Yaki Point, Pipe Creek Vista.

Grand Canyon Visitor Center
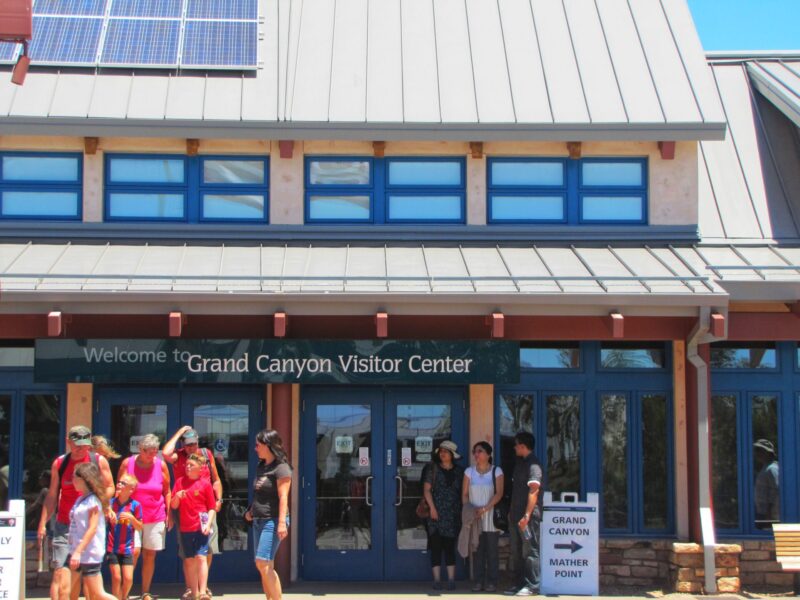
Grand Canyon Visitor Center

Our first stop in the Grand Canyon itinerary was the Visitor Center, the busiest area in the Grand Canyon National Park.

At the Grand Canyon Visitor Center, you can get the ranger suggestions and the orientation maps to the Grand Canyon. Besides, the visitor center is the main shuttle bus interchange station if you plan to take up the shuttle service. It also has restrooms, the largest book and gift store in the park.

We are lucky as we parked right outside the visitor center. It can be hard to find the car park if you arrive late. While waiting, you can also enjoy the Granton Canyon View from the viewing point right in front of the visitor center.

Mather Point
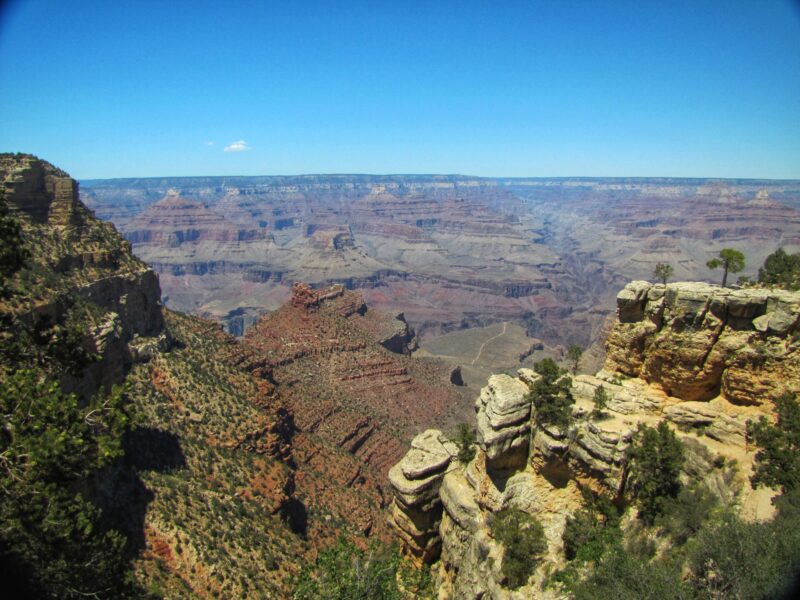
Stunning View at Grand Canyon
Stunning View on Grand Canyon

Next, we walked from the viewing point by the visitor center to Mather Point, the closest view of the rim from the visitor’s center. It took us about 5 minutes as it is adjacent to the Grand Canyon Vistors Center.

If you only can visit one viewpoint in Grand Canyon, I would probably suggest Mather Point. The views are spectacular and amazing. It is probably the most crowded lookout point and it gives you a great view looking to the East side of the Grand Canyon.

To get there: Walk the Rim trail or take the Kaibab Rim Route, the orange line.

Yavapai Point

The Yavapai point is another place you have to go to see on the Grand Canyon itinerary.

We walked alongside the rim towards Yavapai Point. Alternatively, you can also take the shuttle over Yavapai Point. The trail is only 0.7km for one way and easy to walk through. Moreover, you’ll be rewarded with great views along the way.

The view from Yavapai Point is spectacular. The full grandeur of the Grand Canyon is on display and there are multiple spots to take. If you have time, it is also worth it to venture into the Geological Museum. The museum has a full model of the Grand Canyon and lots of interesting and informative about the geological history of the area.

To get there: Walk the Rim trail or take the Kaibab Rim Route, the orange line.

Hermit’s Rest Viewpoints

Next, we back to the Visitor Center and hop on the Hermit Road Shuttle to Hermit’s Point Viewpoints. This scenic route with a series of 9 stops with viewpoints that offer incredible views of the Canyon.

Hermit’s Rest Viewpoints (and shuttle stops): Trailview Overlook – Maricopa Point – Powell Point – Hopi Point – Mohave Point – The Abyss – Monument Creek Vista – Pima Point – Hermits Rest.

The en route is about 7 miles and the shuttle will stop at designated points for about 15 to 30 minutes. You can hop on and off along the stops to explore each viewpoint as much as you can, or even plan for a hike.

Powell Point
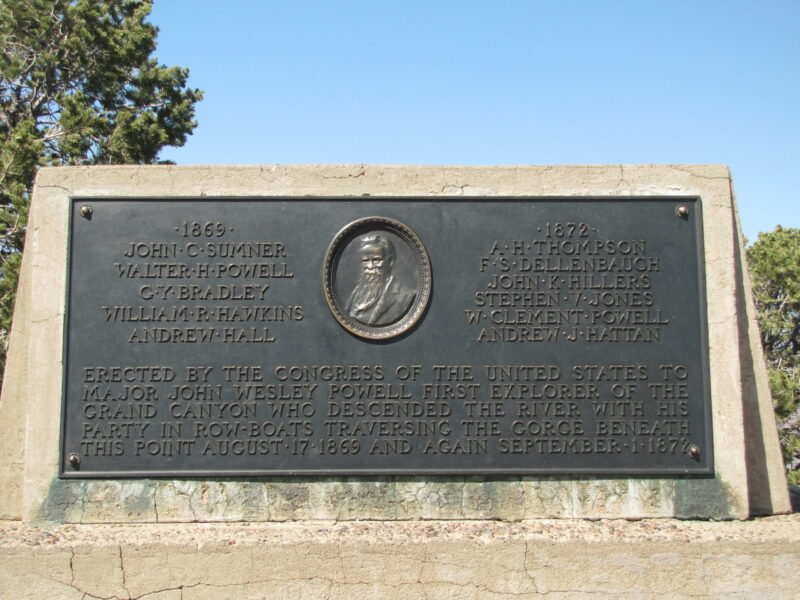
Grand Canyon Travel Blog - Powell Memorial
Powell Memorial

At Powell Point with Stunning Vista. We highly recommended spending some time enjoying the magnificent view at this stop.

There is Powell Memorial at the Powell Point viewpoint commemorates the 1869 and 1871-72 exploratory trips down the Colorado River by Major John Wesley Powell and expedition crews.

Hopi Viewpoint
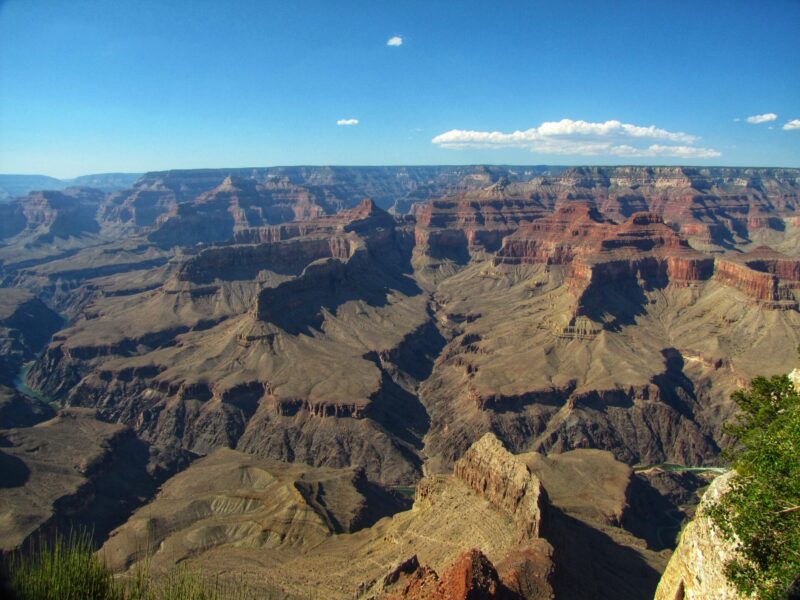
Stunning Canyon View at Hopi Point

A short distance to Powel Point is the Hopi Viewpoint. The view is magnificent although it is quite similar to Powell Point. Hopi Point is also one of the popular viewpoints with its wide unobstructed views in the Grand Canyon.
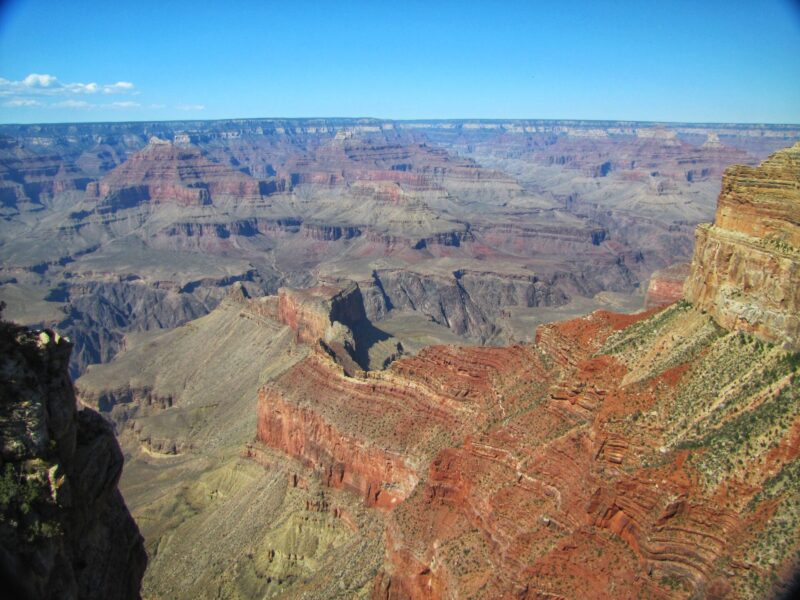
Grand Canyon Travel - Mohave Point
Mohave Point

Another must-visit in the Grand Canyon itinerary. The Mohave Point offers views of the Colorado River deep in the canyon below.
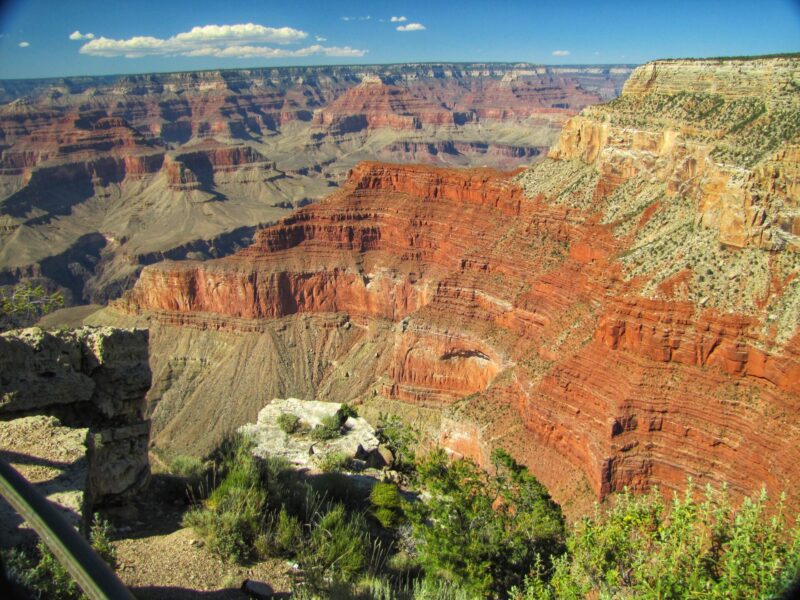
Grand Canyon Travel Blog - Monument Creek Vista
Monument Creek Vista

One of the stops for Hermit’s Point Viewpoints is Monument Creek Vista. The view is stunning and worth spending time on the Grand Canyon travel blog.

Hermits Rest
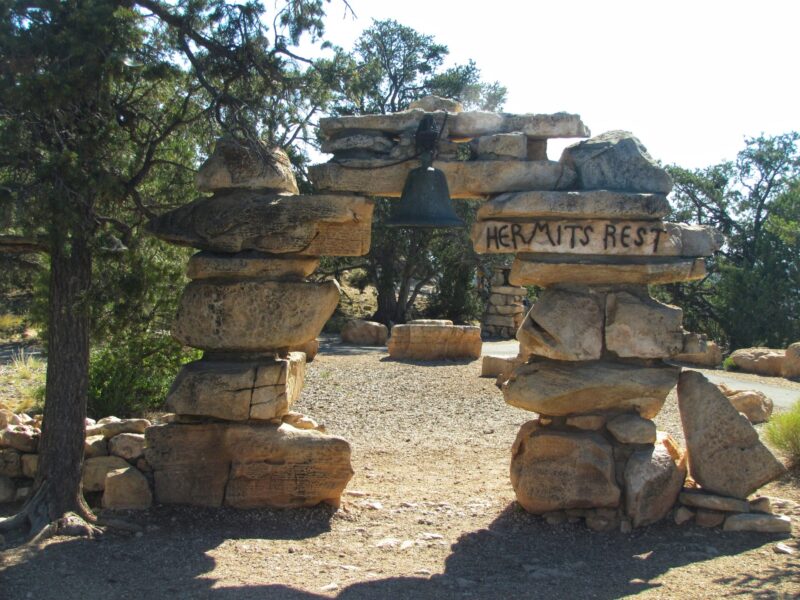
Hermits Rest

Hermits Rest is the last stop on the Hermits Rest Road Shuttle bus service
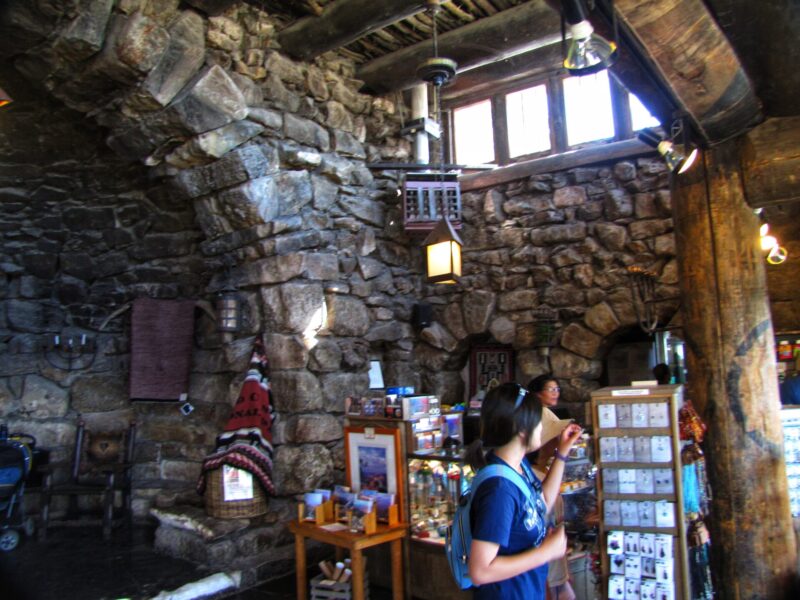
Stone Building at Hermits Rest

At the last stop at Hermit’s Rest, there is a stone building with a fireplace selling gifts and serving hot drinks. You can take some rest and spend some time exploring around.

We started the Hermit Drive adventure after our lunch and hopped on and off along the stops. We stopped by Trailview Overlook, Maricopa Point, Powell Point, Hopi Point, Monument Creek Vista until we reached the Hermits Rest.

You can plan and spend at all the viewpoints depending on how much time is allocated for your Grand Canyon itinerary. In my opinion, Powell Point and Hopi Point have the best view along the Hermits Rest Route.

To get there: Take the Hermit’s Rest Route, the red line.

Sunset at Yaki Point and Pipe Creek Vista
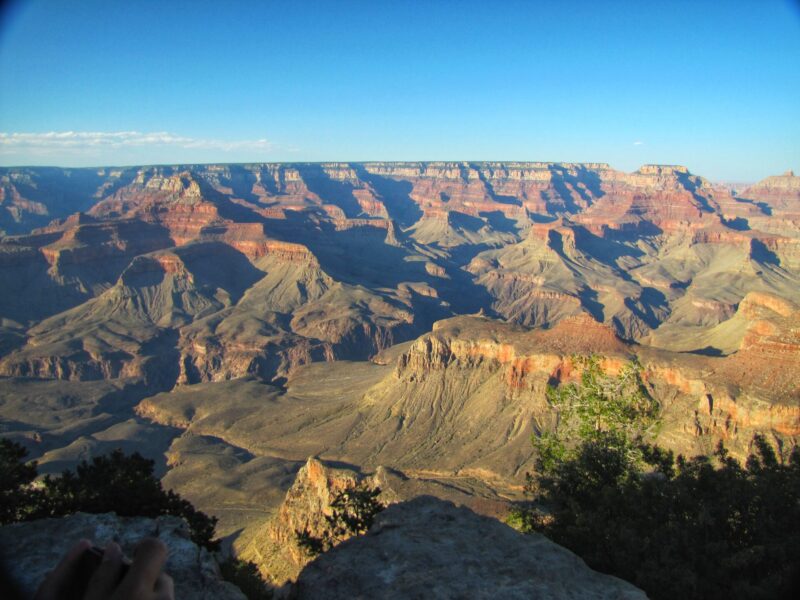
Grand Canyon Itinerary - Yaki Point
Grand Canyon Itinerary – Yaki Point

In the late afternoon, we took the shuttle back to the Kaibab Rim Route. On this route, we stopped off the Yaki Point and Pipe Creek Vista.
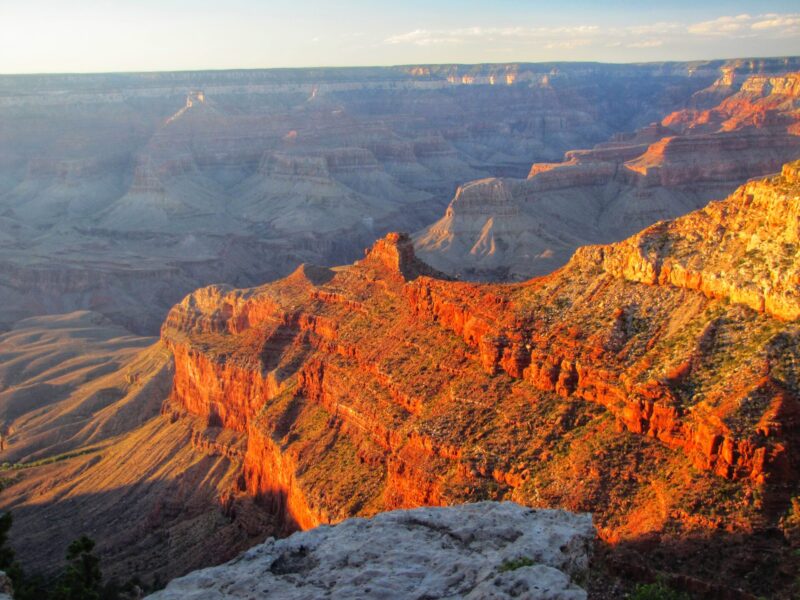
Best Place for Sunset at Grand Canyon Travel Guide
Watching Sunset at Grand Canyon – Pipe Creek Vistas

During the evening, the Yaki Point and Pipe Creek Vistas are extremely stunning as fading light of sunset brings out rich colors in Grand Canyon’s rock layers. We spend a lot of taking nice photography at these two viewpoints while waiting for the sunset at Grand Canyon.

Lastly, we took our car and continue our journey to Page. We stayed one night in Page and prepared for our next adventure to Antelope Canyon.

To get there: Take the Kaibab Rim Route, the Orange line.

What and Where to eat in Grand Canyon

Food is very expensive and only have limited options are available inside the Grand Canyon National Park. You can go to the Grand Canyon Village or Market Plaza to look for food. But it is usually very crowded and lines get very long, especially during lunch hours.

Additionally, if you want to eat somewhere special then the historic El Tovar is a great option. It served with fine dining with stunning canyon views. Reservation is recommended.

During our visit to Grand Canyon, many restaurants are closed or carried out only. We bought the sandwiches for lunch and continue our venturing journey. So it is advised to plan your meals or have plenty of snacks before you go.

Hiking in Grand Canyon
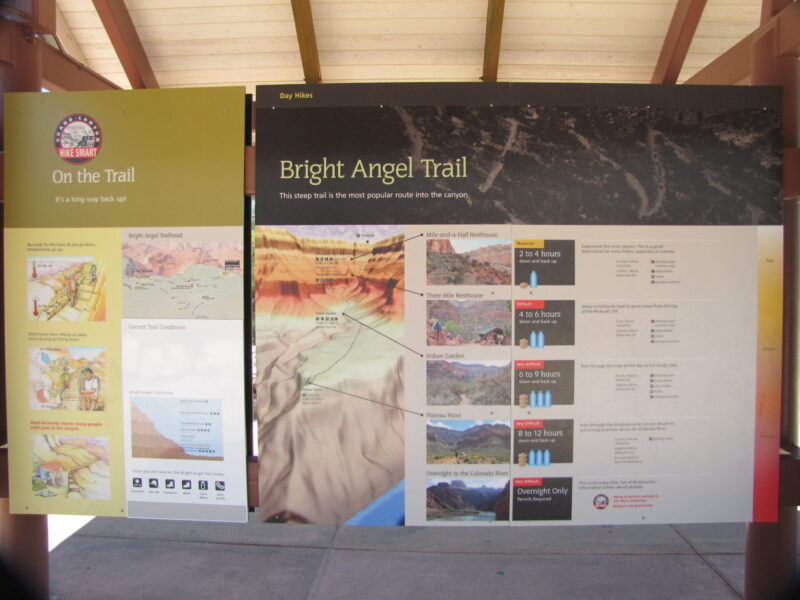
Hiking is undoubtedly the best way to take in the grandeur of the Grand Canyon. We did not hike down into the canyon, but really enjoyed all the viewpoints along the rim road. If you’re planning for a great hike down into the Canyon, we recommended two options for a short hike in Grand Canyon.

From South Kaibab trailhead and hike to Ooh Aah Point, which is about 1.8 miles round trip. The Ooh Ahh Point is one of the favorite spots to stop for pictures and I highly recommend it for visitors looking for a shorter but worthy hike. It cannot be accessed by private vehicle and only can catch a shuttle (Orange line) to the trailhead. Alternatively, park on the side of highway 64 near Yaki Point road and walk about 1/2 mile to the trailhead.

Another less strenuous option is Bright Angel Trail. It is another popular and easiest access for hiking in Grand Canyon. It has lots of shops at the top where you can get last-minute supplies such as water and snacks. Parking is very limited and it is very difficult to find parking near the trailhead.

Watch Sunrise in Grand Canyon

If you are staying in Grand Canyon, don’t forget to wake up early for the magical sunrise when the light hits the canyon walls.

There are a few favorite spots for travelers to watch the magnificent sunrise view in Grand Canyon. The Mohave Point on Hermit Road and Mather Point, Yavapai Point nearby the Visitor Center are the popular sunrise viewpoints in Grand Canyon. The locations offer stunning sunrise vistas with stunning sunrise views.

However, expected a huge crowd to share the same excitement with you. It is recommended to stay within the park to save your traveling time in the early morning.

More Grand Canyon Travel Guide Tips
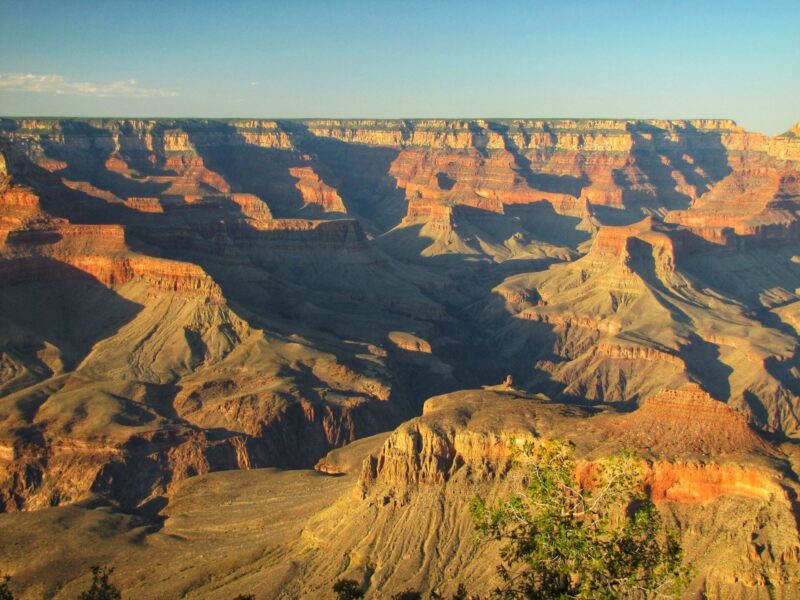
Grand Canyon Travel Guide Tips

To enjoy the visit to Grand Canyon South Rim here is our quick and simple tips for your Grand Canyon itinerary:

  • Get the America Beauty Pass as it really saves us a lot of money during our trip to the USA.
  • At the Visitor Center at the park entrance, please get the maps and plan out what you want to see. Grand Canyon is easily planned for a self-tour.
  • Please fully utilized the shuttle system service as parking is limited at most of the viewpoints. If you are planning for self-driving, please start your day as early as possible. Please check the Grand Canyon NP website for road condition information.
  • Wear multiple layers for flexibility and comfortable shoes or hiking boots with a good grip. Hat and sunblock are highly recommended, especially in Summer.
  • Bring water and snacks as there are not many stores or vending machines in the park.
  • Cellular data and WiFi are basically nonexistent
  • Lastly, get to the Grand Canyon National Park early!

Overview: A Trip to Grand Canyon South Rim
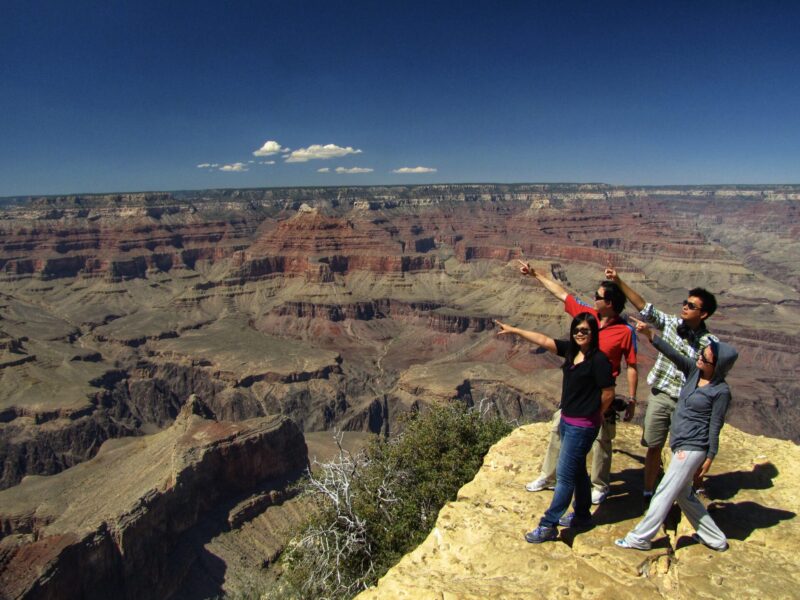
Grand Canyon Travel Blog

All in all, a visit to Grand Canyon was on my must-do list and I’m happy to have made the effort to go. Photos alone do not do justice to the sights of the massive size of the Grand Canyon. You have to be with your eyes to admire this nature experience.  

We were short in time and only had a few hours in Grand Canyon before we traveled to Antelope Canyon. In total, we spent just about 6 hours in the park. But still, we highly suggest making a stop even if you don’t have time for a full-scale adventure. This is a very easy and excellent sightseeing attraction on a world scale-definitely not to miss if you are in the canyon country!

Last but not least, we hope you enjoy reading our Grand Canyon itinerary. Do you plan on visiting other National Parks and popular cities in the USA? Feel free to check out our travel guide blog below.

Travel in California:

Travel in Arizona:
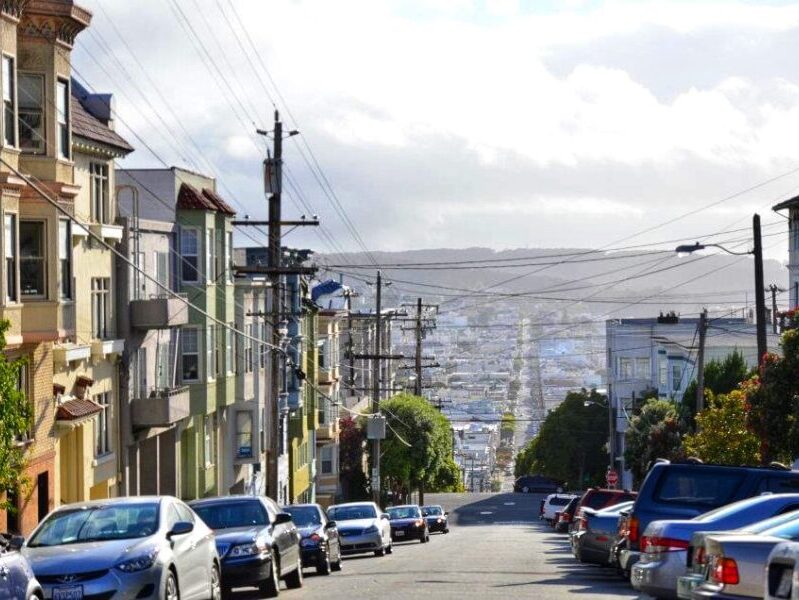
 

Big Sur Itinerary Travel Guide Blog

Big Sur Itinerary: Highway 1 Road Trip Travel Guide Blog

posted in: United States | 0

Last updated on December 22nd, 2024

If you are planning for a Big Sur itinerary, we’ve got you covered. Here we’ll share the notable stops with the best viewpoints along this coastal route for the California Highway 1 road trip. Let’s check it out!

We were doing a California road trip vacation from San Francisco and then down the coast back to Los Angeles. The Big Sur road trip was the most unforgettable and also the best road trip I have ever done in the United States.

There are lots of things to do in Big Sur and make sure you make the most of it. You could certainly spend several days exploring it on your Big Sur road trip itinerary. But if you only have a limited one day, it is also possible to squeeze it into a day trip.

In this Big Sur travel guide blog, we’ll share the best Big Sur itinerary with the key stops and viewpoints along the coastline. You can visit most of the main attractions for your weekend gateway or simply a short day trip. I will explain more in detail with travel tips to help you make the most of your time there.

So, read on for the most perfect Big Sur road trip itinerary!

Big Sur, California Highway 1

Big Sur Travel Guide Blog

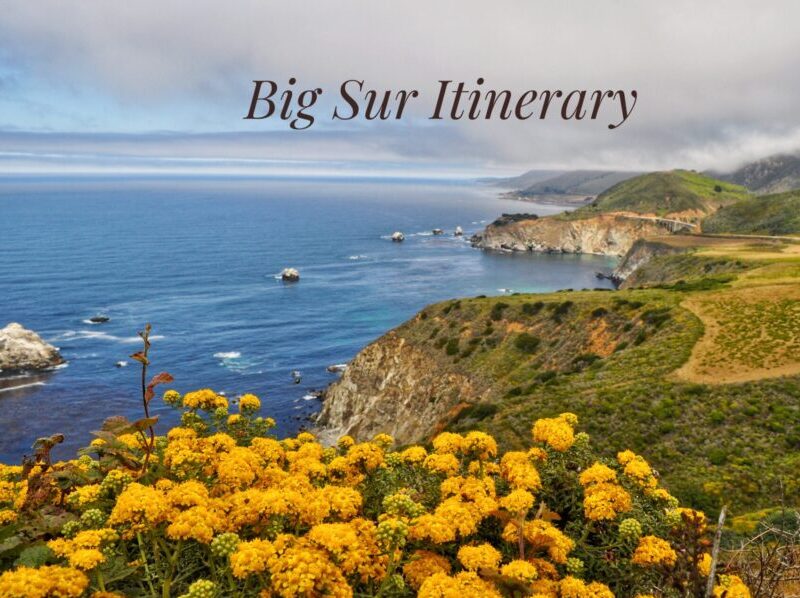
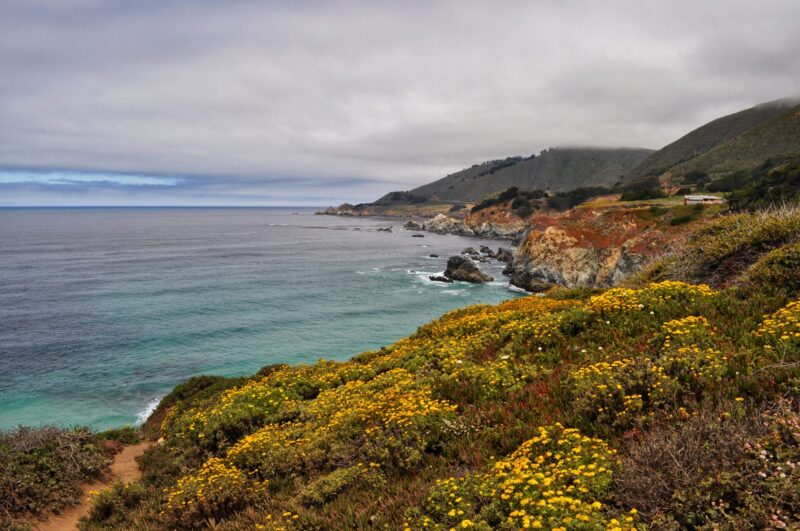
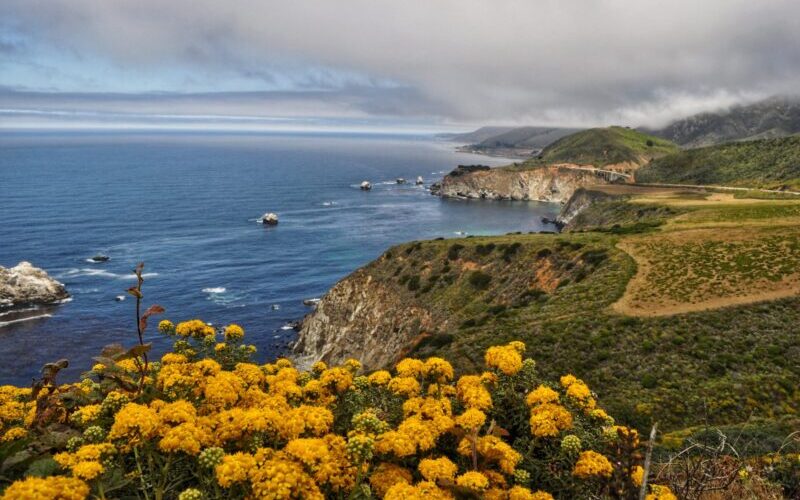
Known as California Highway 1, Big Sur is a popular strip of California highway that runs from the Central Coast of California near Carmel-by-the-Sea to the San Simeon area. The dramatic coast is one of the most scenic stretches of California coastline and is best to plan for a California road trip.

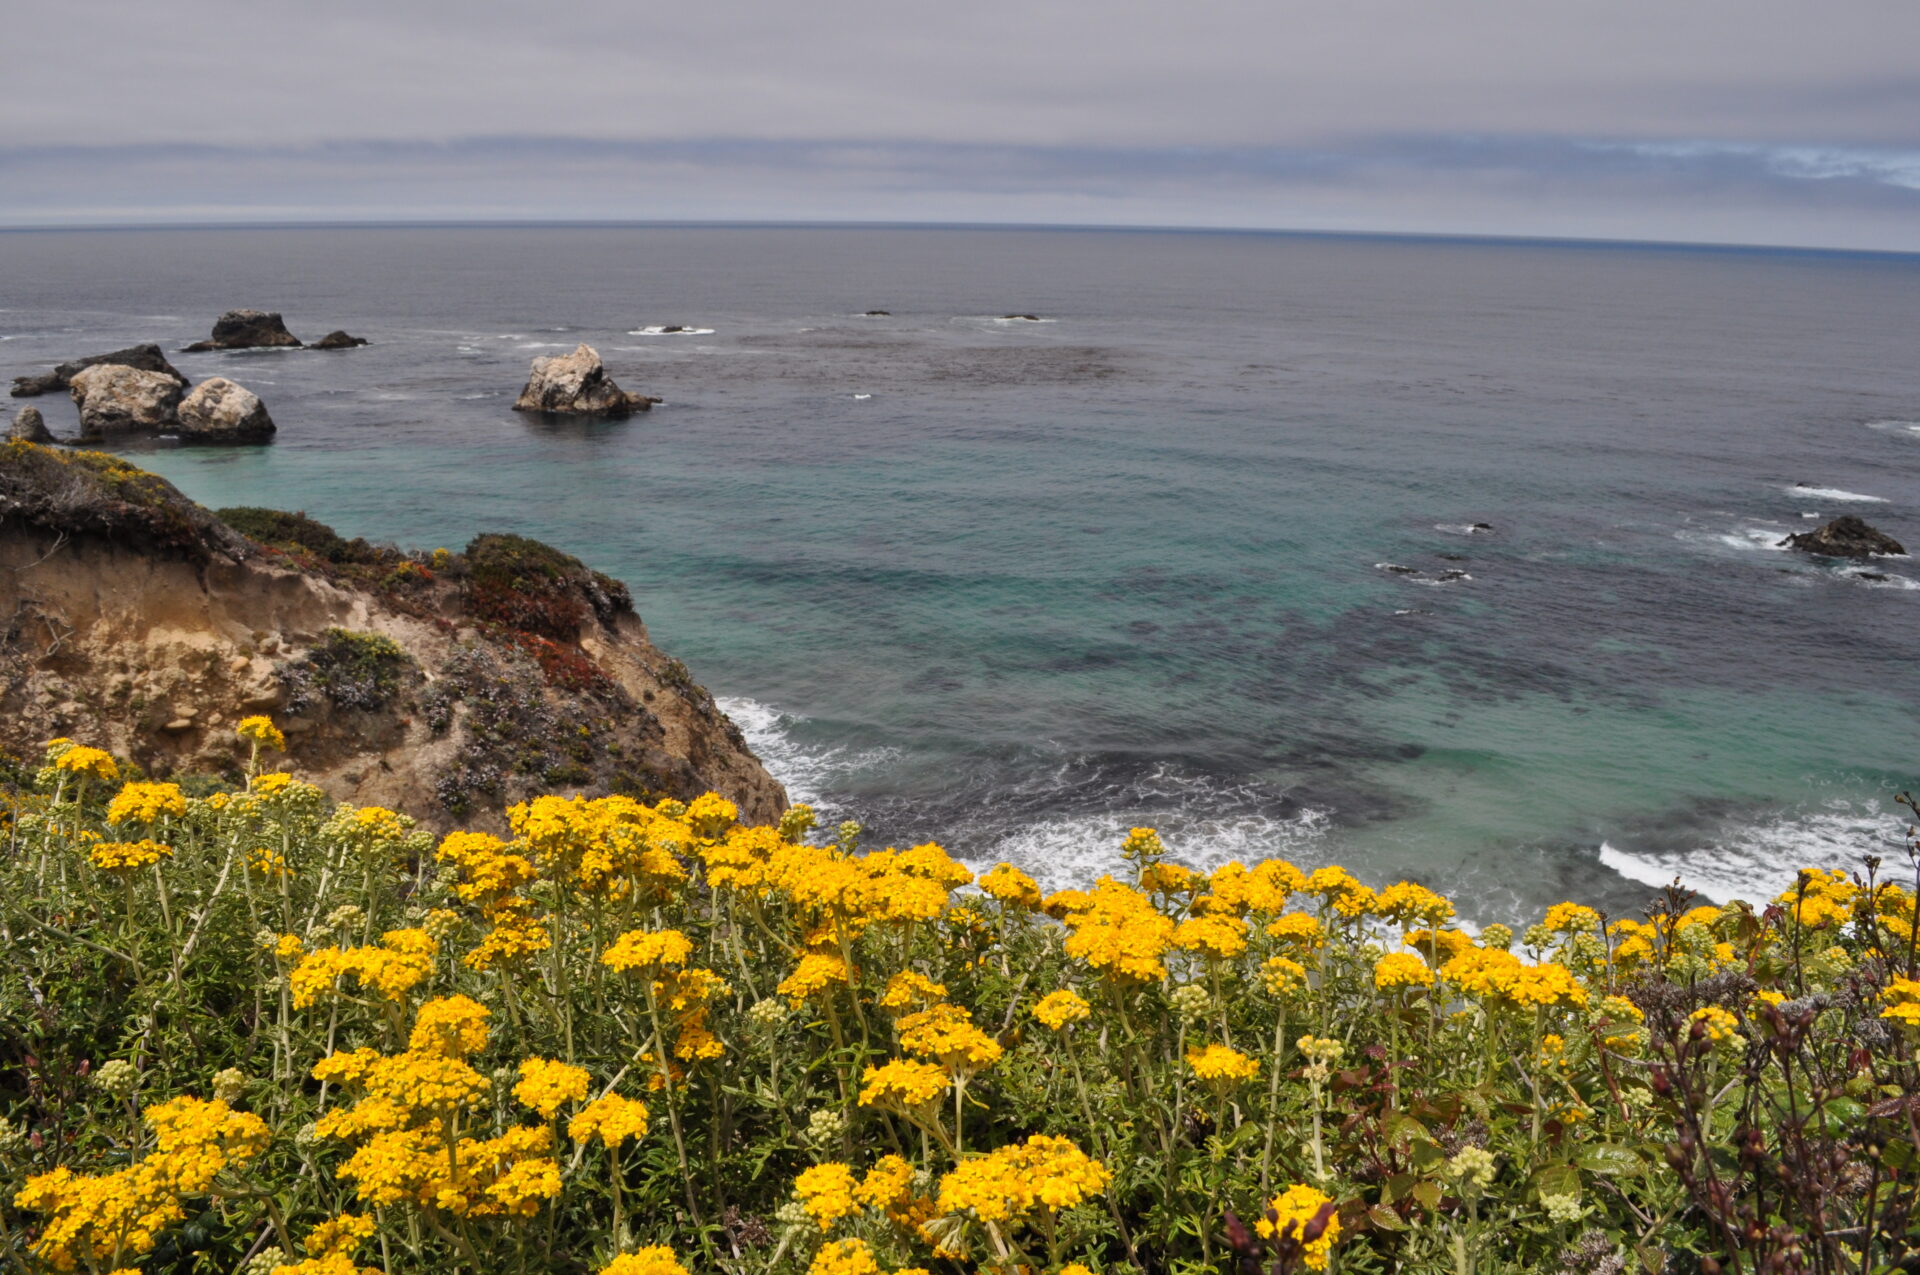
Along the 96 miles drive, you’ll be seeing the pristine coastline with rocky cliffs, well-preserved states parks, stunning ocean with beaches, rustic natural scenery, and a relaxing ambiance.

The Big Sur road trip is best done from north to south. Many of the beaches and viewpoints are right on your sides which gives you the best coast view. We drove along the coast from San Francisco to Los Angeles, stopping in Carmel, and Santa Barbara along the way.

Big Sur Travel Tips: If you need a rental car for your California Big Sur road trip, we recommend booking your car with RentalCars.com, where you will find the best rental car prices. You can save up to 70% on your rental car booking!

Big Sur Travel Guide Tips

To make the most of your Big Sur itinerary, here are a few travel tips you should know before hitting the road!

What is the best time to visit Big Sur?

You can visit Big Sur at any time of the year and the most popular season is April through October. We highly recommend visiting Big Sur in early spring as it is a nice time to catch the gorgeous wildflowers along the trails and coast. The weather is nice and the skies are very likely to be clear.

Is one day enough for Big Sur?

With proper arrangement and planning, a day trip to Big Sur is doable. But you’ll need to get there early and come back late. If possible, I would recommend staying a few days to enjoy the majestic view at a relaxing pace.

How long does it take to drive through Big Sur?

The drive through Big Sur is a 90-mile stretch along California’s Pacific Coast. It will take you approximately two to three hours without making any stops. But trust me, you probably need a day to explore this beautiful coastal adventure.

Do I need to pay to visit Big Sur?

All of the California state reserves and parks charge $10 per vehicle for day use. This means that you’ll need to pay once and it allows you to access other California state parks within the day. Just make sure to show and taped it on your windshield.

Is Big Sur worth visiting?

Definitely worth it! California’s Highway 1 through Big Sur offers insane views and picturesque landscapes. Your trip to Big Sur will leave you with the most beautiful sights your eyes will see.

1-Day Big Sur Itinerary

Below are the best stop and viewpoints along Highway 1 for the 1-Day Big Sur itinerary:

  • Point Lobos State Natural Reserve (1 to 2 hours)
  • Garrapata State Park (30 minutes)
  • Lunch at Rocky Point Restaurant
  • Bixby Creek Bridge (30 minutes)
  • Pfeiffer Big Sur State Park (1 hour)
  • Pfeiffer Beach (1 hour)
  • Julia Pfeiffer Burns State Park & McWay Falls (1 to 2 hours)
  • Elephant Seal Vista Point (30 minutes)

Big Sur Travel Tips: The allocation time is based on the assumption and it can be different depending on the activities and traffic. You may also need to include the traveling time from one point to another point along the journey.

Big Sur Travel Tips: If you are planning for Big Sur trip but tired of driving, you can consider to join the tour. The Monterey, Carmel and 17-Mile Drive – Full Day Tour from San Francisco from Viator (A Tripadvisor Company) drive down this one of the most scenic roads in California with breathtaking scenery along the journey. It is hasstle free without planning on too much for a wonderful trip!

Point Lobos State Natural Reserve

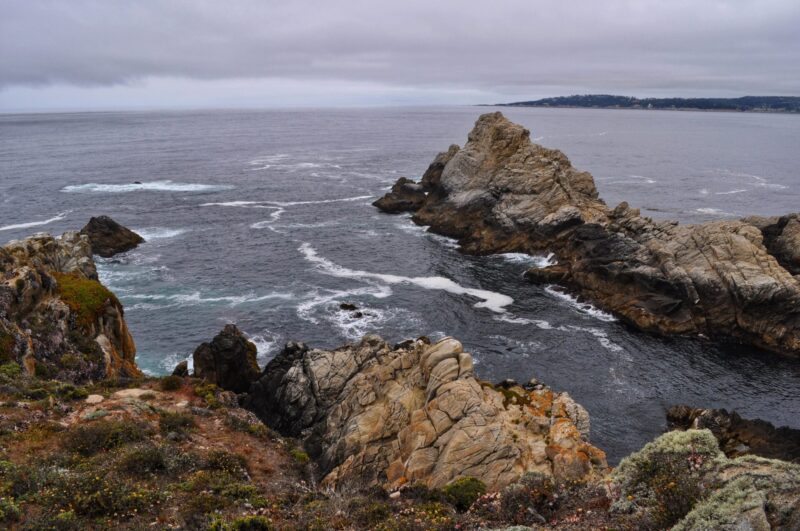
Big Sur Itinerary - Point Lobos State Natural Reserve
Breathtaking View at Point Lobos State Natural Reserve

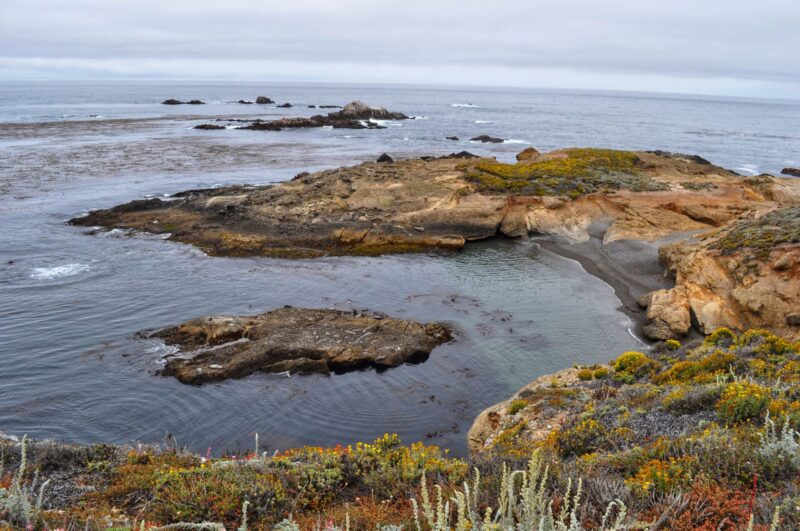
Point Lobos State Natural Reserve is definitely one of the best places to visit on a Big Sur itinerary. This natural reserve is full of breathtaking scenic views, unique geological formations, and plenty of marine wildlife.

You can go sightseeing, photography, hiking, picnic, or even go Scuba diving.

Breathataking View at Point Lobos State Natural Reserve

There are a few suggested route and hiking options at Point Lobos. Most are relatively short (~1 mile or less) loop trails that were pretty simple to hike but had amazing scenery. You could spend all day hiking around and enjoying the spectacular scenery.

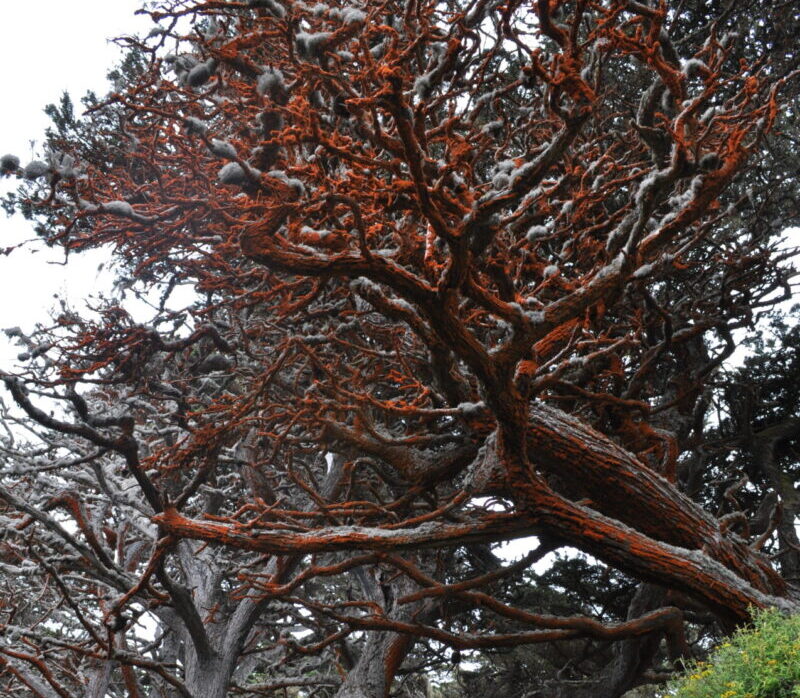
Red Woods at Cypress Grove Trail

Due to our relatively limited time here, I recommend taking a short trail. We spent about an hour on a beautiful short hike at Point Lobos. We parked at the Sea Lion Point parking area and took the Cypress Grove Trail.

This 0.8-mile Cypress Grove Trail is relatively flat with several small elevation changes. It is an easy trail loop through the cypress groves with a spectacular rocky shoreline view. Highly recommended.

  • Official Website: https://www.pointlobos.org/
  • Park Opening Hour: 8:00 to 17:00 (Last entry at 16:30).
  • Parking: Parking is very limited so get there early, or plan to park on the road shoulder and walk in.
  • Estimate time: 1 to 2 hours for a short hike.

Big Sur Travel Tips: Please take note that dogs are not allowed anywhere on the Natural Reserve. It does not even allow them to be kept in the car while you explore the park.

Garrapata State Park

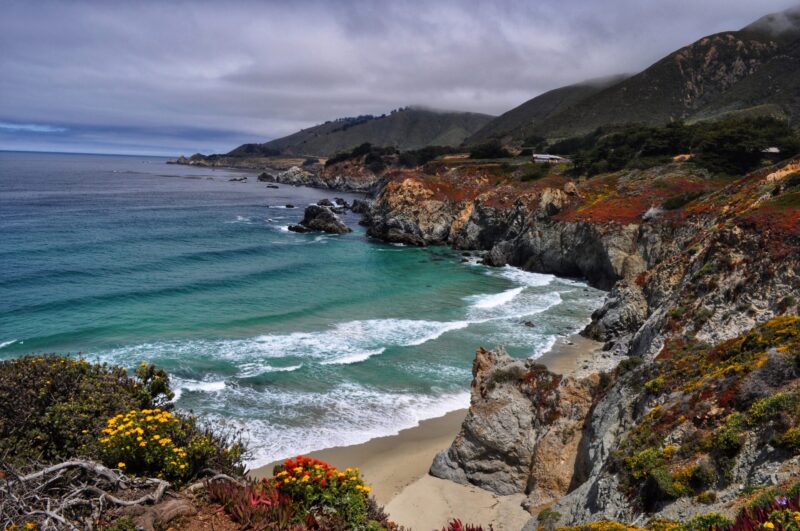
Garrapata State Park - Big Sur Itinerary

Garrapata State Park is a hidden jewel that is just a short drive from Point Lobos. It is one of the lovely nature spots on California Highway 1 and you can’t go wrong stopping here while exploring Big Sur.

The enchanting state park offers rocky coast with amazing views of the ocean, rocks, and cliffs. You can stay at the top viewing on the ocean and cliff, or walk down the steps right to the water. There are a few optional hiking trails where you can spend hours admiring nature beauty.

We spend about 30 minutes here at the top and took many beautiful pictures. We were blown away by the stunning scenes and spectacular coastline. Everything is awesome!

Rocky Point Restaurant

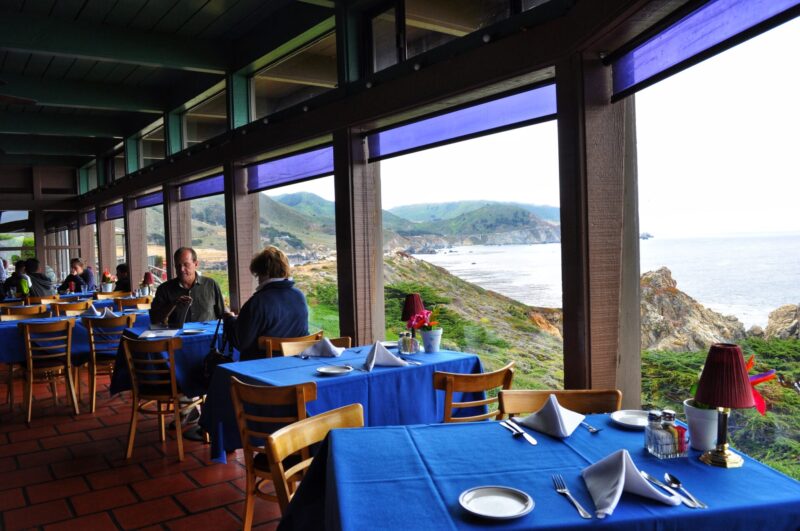
Rocky Point Restaurant

We decide to stop off for early brunch and it turned out to be one of the best meals I have ever had.

Opened in 1947, the Rocky Point Restaurant is a great place for food while enjoying the spectacular view of the Pacific Ocean coast. The scenery outside of the restaurant was stunning.

Lunch at Rocky Point Restaurant in Big Sur
What To Eat in Big Sur

The food was marvelous and tasty. All are beautifully plated and prepared with fresh ingredients. The price is slightly expensive but worth going for the great view.

If you have time you can stroll the paths behind the restaurant and breathe in the delicious fresh air and the beautiful flowers. What a perfect place to stop for brunch while enjoying stops along Big Sur.

Note: This nearly 75-year-old Rocky Point Restaurant is temporarily closed. You may consider Nepenthe, another popular eatery perched on a Big Sur cliffside located 30 minutes away.

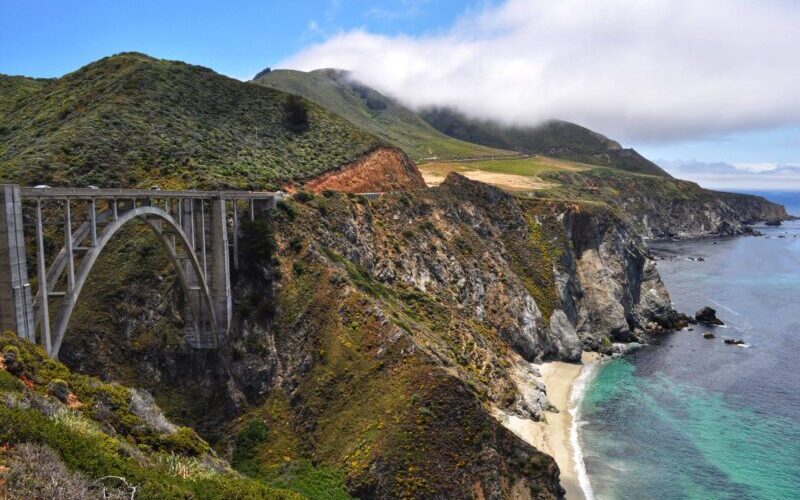
Bixby Creek Bridge

Bixby Creek Bridge - Big Sur travel blog
Bixby Creek Bridge

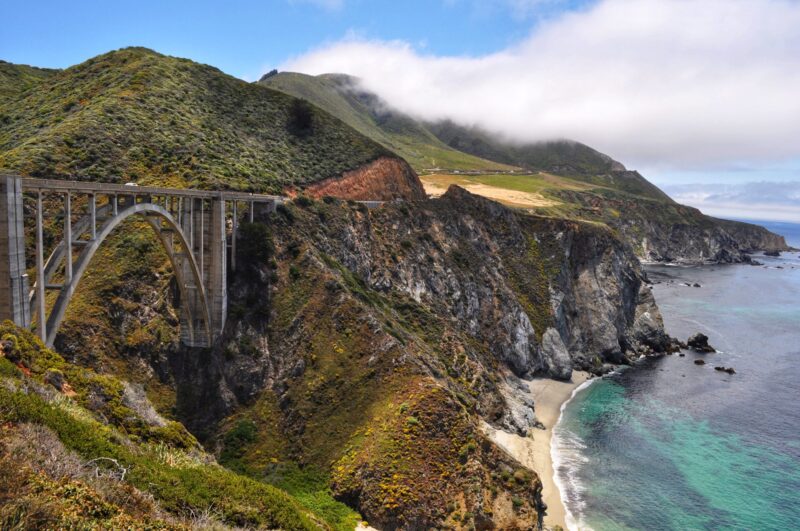
Known as ‘Bixby Bridge’ or ‘Bixby Canyon Bridge’, Bixby Creek Bridge is an iconic landmark in Big Sur. This feat of engineering is built in 1932 and connected two rocky cliffsides along highway 1. It is one of the most photographed bridges in California due to its design, graceful architecture, and magnificent setting.

We stopped at the viewpoint and were able to get many stunning pictures. The bridge itself is marvelous as it’s a true engineering achievement. Together with the natural scenes all around the bridge, it is at the top of Instagram-worthy destination lists. Definitely worth the stop on your way through Big Sur.

There is no clear sign on Bixby Bridge, but you’ll know when you arrive because of the crowds and cars dotted around the roadside. There is a convenient pull-out but be warned of parking issues on winding roads.

  • Estimate time: 30 minutes for viewing.

Pfeiffer Big Sur State Park

After admiring Bixby Bridge, continue the Big Sur itinerary to the next destination. The Pfeiffer Big Sur State Park is a large beautiful park in Big Sur that covers approximately 1,006 acres of land.

There are many different trails that each offer something different to explore. You can take the easy 1.5 mile Pfeiffer Falls trail or the moderate 2.6 miles Buzzard’s Roost trail for redwoods. Besides, there’s a nice hotel, a cafe, and a large campground on-site to accommodate hikers, bikers, and RVers.

Pfeiffer Beach

Pfeiffer Beach
Pfeiffer Beach

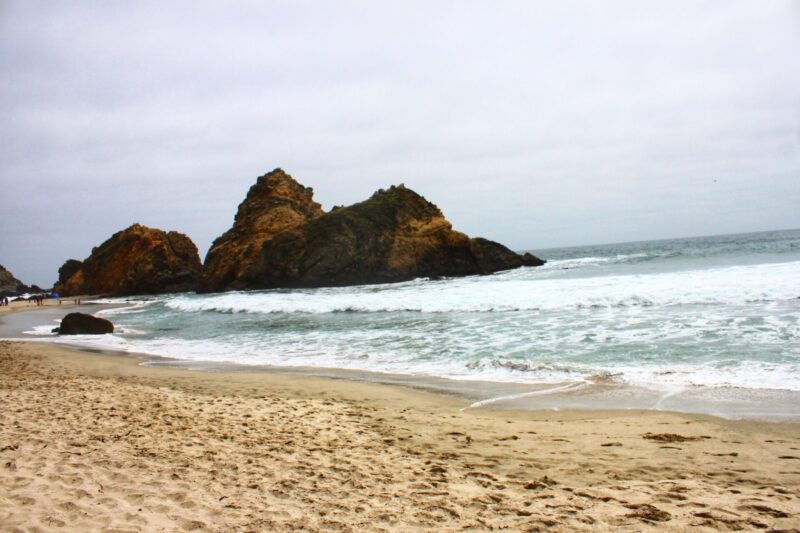
Next, head to Pfeiffer Beach. The Pfeiffer Beach is a secret gem of the Big Sur area and the entrance is a bit hide. There are no signs from the highway leading to the Pfeiffer beach and one could easily miss it.

To get to Pfeiffer Beach, you’ll need to make a sharp right turn onto unsigned Sycamore road located 13.7 miles south of the Bixby Bridge. Following the one-lane narrow paved road for 2.5 miles, you’ll reach the entrance of Pfeiffer Beach. The parking lot is limited and easily fill up on busy days. The rangers will ask you to wait until a parking space opens up.

A short walk from the car park will lead you to the beach with spectacular views of rock formations. The beach isn’t large, but it’s a nice spot for relaxing and enjoying the beach.

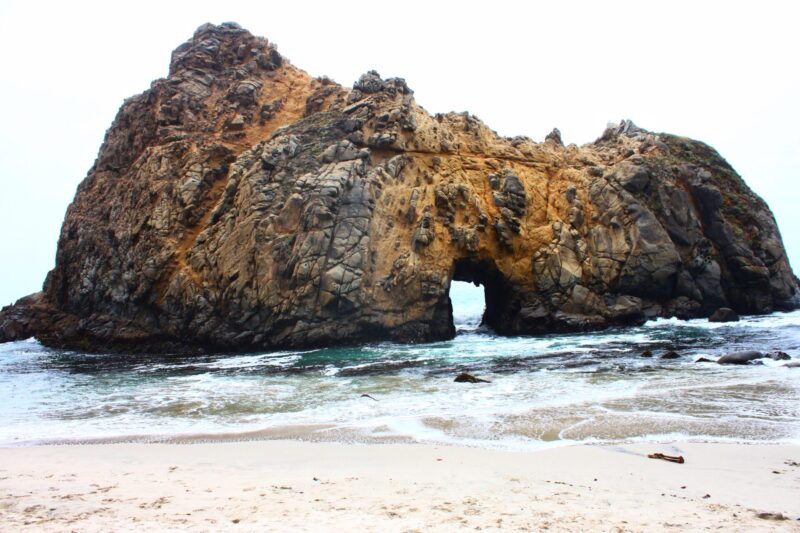
keyhole rock formations at Pfeiffer Beach

We were amazed by crashing waves, keyhole rock formations, and natural scenes. The interesting thing about Pfeiffer beach is the unique distinctive purple sand created by the manganese garnet that is washed down from the hillsides above.

Dip your toes in the magical purple sand and listen to the waves crash along the shore. A must-visit in the Big Sur itinerary!

  • Opening Hour: From 9:00 until sunset.
  • Estimate time: 1 to 2 hours for viewing.

Note: Pfeiffer Beach is operated by Parks Management Company for the Forest Service and not under California State Park. You’ll need to pay the day-use fee costs $12 to access the area.

Julia Pfeiffer Burns State Park & McWay Falls

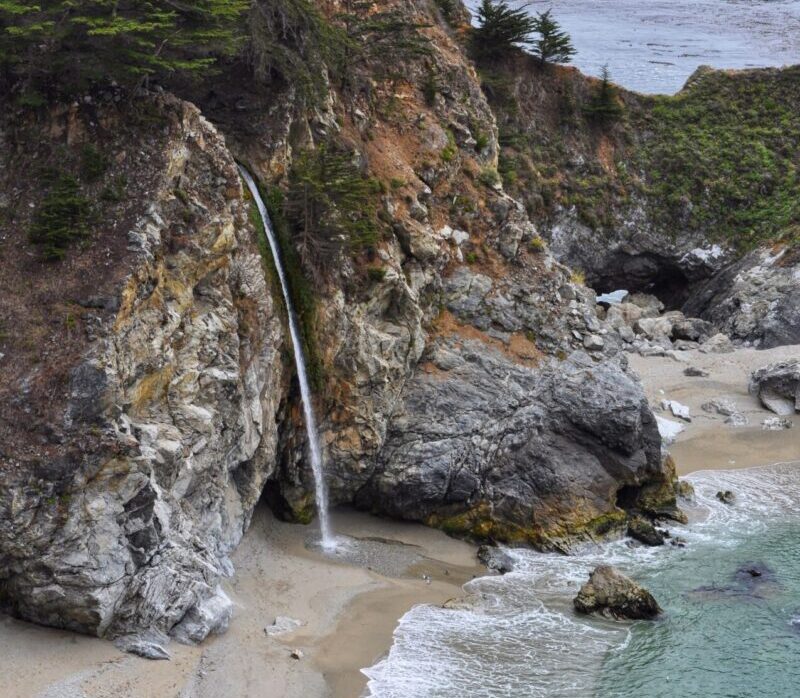
McWay Falls at Julia Pfeiffer Burns State Park

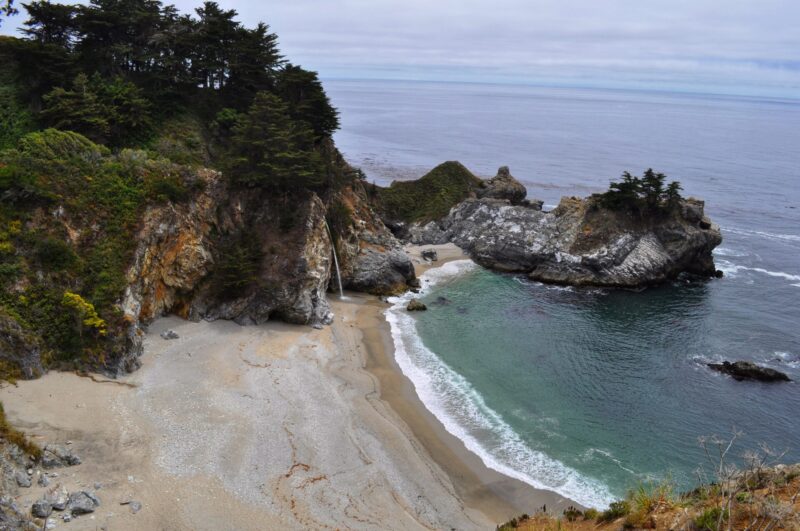
If you are driving on Highway 1, a visit to Julia Pfeiffer Burns State Park is an absolute must. This state park is characterized by steep canyons and ancient redwood trees. The popular stop in Big Sur, McWay Falls is located in Julia Pfeiffer Burns State Park.

A short half-mile trail leads you to the falls overlook for McWay Falls.

McWay Falls
Closer view on McWay Falls

It is an easy walk around the cliffs where you get an amazing view of the ocean and the waterfall. You’ll be mesmerized by the magical view of the McWay Falls that tumble down onto a pristine beach from different angles. Truly spectacular to behold.

If you have more time, you can explore the Julia Pfeiffer Burns State Park by taking the 5.8-mile Ewoldsen loop trail.

Big Sur Travel Tips: Drive into Julia Pfeiffer Burns State Park required to pay $10 for parking. Alternatively, you can park on the roadside and walk-in for free.

  • Official website: https://www.parks.ca.gov/
  • Park Opening Hour: From 8:00 until sunset.
  • Estimate time: 1 to 2 hours for viewing.

Elephant Seal Vista Point

Elephant Seal Vista Point - Big Sur Travel Guide Blog
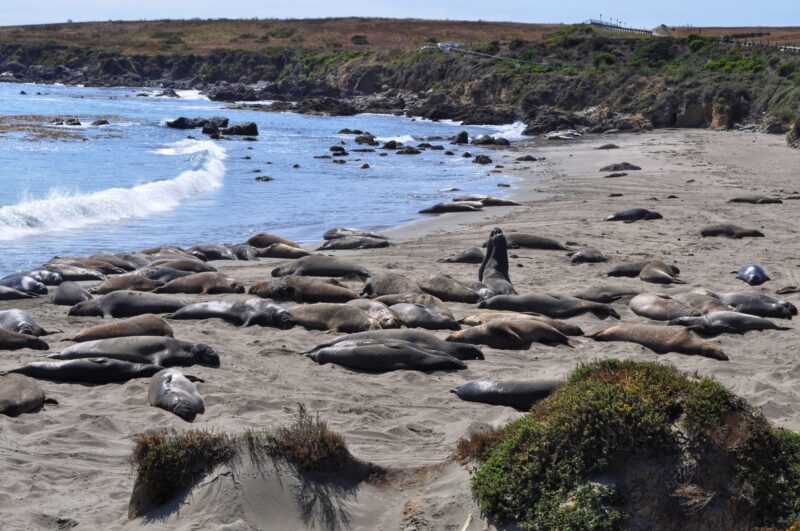
Elephant Seal Vista Point in San Simeon

For animal lovers, the Elephant Seal Vista Point in San Simeon is one of the most interesting stops you can make along Highway 1. It is the best spot to see these magnificent marine mammals up close on one of the prettiest coastlines in California.

We were pleasantly surprised to see hundreds of seals laying all up and down on the beach during our visit. All the elephant seals are playing around, chilling and cuddling under the California sun. There is also helpful signage with good information about the elephant seals

We stayed about 30 minutes just watching them. Very entertaining!

  • Opening Hour: Always open!
  • Estimate time: 30 minutes for viewing.

Where To Stay

You could easily do the whole Big Sur itinerary in a day if you started early enough in the morning. But if you want to take more time on the drive, consider spending one night at Big Sur and exploring Big Sur leisurely. However, note that the accommodation in Big Sur is limited and the average price is also slightly on the high side.

If you want to stay in the mid-point of the Big Sur, you may consider the Big Sur Lodge. You’ll stay in a clean and beautiful cabin, surrounded by beautiful trees. It is located in the Pfeiffer State Park and has easy access to the hiking trails and the beach. A comfortable stay in a beautiful setting. Check Rate here: Big Sur Lodge

For an upgrade, I would highly recommend Alila Ventana Big Sur which is surrounded by redwoods with stunning views of the coast. This adult-only property is very peaceful and well maintained. It features 2 heated pools adjoined by a Japanese hot bath and an on-site art gallery. The location is excellent which is about 10 minutes from Pfeiffer Beach, and minutes to the nearby state park. Check Rate here: Alila Ventana Big Sur

Another best option for Big Sur accommodations is staying in San Simeon. The accommodation options here are cheaper and you can even extend the Big Sur itinerary to Hearst Castle.

Cavalier Oceanfront Resort is a beachfront resort with an incredible view. It is one of the best options nearby with an affordable price, given the quality and the prime location. The property also features 2 heated outdoor pools and a hot tub, a nice on-site restaurant, and provide free wifi for the guests. Check Rate here: Cavalier Oceanfront Resort

Overview: Big Sur Itinerary

Big Sur Travel Blog

All in all, I am highly recommended Big Sur for you to experience the California coastal view. Of course, there are a few more interesting places in Big Sur awaiting you to explore. But all the attractions above are good enough if you only have one day in Big Sur. Plan ahead your Big Sur itinerary and start your day early, you should be able to experience the best of the Highway 1 road trip in one day. Enjoy!

Planning a Trip to California? We’ve got plenty of California travel guides to help you plan an amazing trip.

San Francisco Itinerary Travel Guide Blog

San Francisco Itinerary: An Epic Travel Guide Blog

posted in: United States | 0

Last updated on December 22nd, 2024

San Francisco is a city for everyone that worth takes a lifetime to slowly discover. Here we have put together a three days San Francisco itinerary with all the best things to do in San Francisco. Feel free to adjust the schedule, and create your own two or three days San Francisco itinerary.

Home to the majestic Golden Gate Bridge, San Francisco (SF) is one of my favorite cities in the world. The city’s history is rich and filled with California Gold Rush lore and colorful immigrant stories. It has all sorts of excellent museums, Victorian architecture, and the oldest and biggest Chinatown in the country. All this makes San Francisco one of the unique American destinations on many travelers’ lists.

However, planning a trip to a big city like San Francisco is not easy. There are so many iconic sights and places to visit that hard to squeeze it into a few days of visit. Ideally, I think you should plan on spending at least three days in San Francisco in order to see the bare minimum of what the city has to offer. It makes a great city break with 2 days in the city and another 1 day to the nearby attractions. You can explore it beyond the typical tourist attractions if you have additional days.

To help you plan your trip to San Francisco, I’ve put together the perfect San Francisco itinerary. In this San Francisco travel guide blog, you’ll learn to figure out what to see, what to do, where to stay, where to eat, and the suggested San Francisco itinerary to fit them all within 2 to 3 days of the visit.

San Francisco Pre-Trip Essential

In this section of the San Francisco travel guide, I like starting with a few quick travel tips and some of the essential travel information for your San Francisco itinerary.

Best Time To Visit

Best Time Visiting San Francisco

San Francisco is a year-round travel destination. But the weather is unpredictable! The city is famous for the fog that suddenly rolls in on a sunny day. That being said, it is important to know what is the best time to visit San Francisco if you want to avoid ‘Karl the Fog’ and have the blue sky and perfect weather.

The best time to visit San Francisco is during the fall from September to November. At these times of the year, San Francisco is less fog and the temperature is warmer. It is also fewer crowds compared to summer. Spring is another good time to visit San Francisco, thanks to its mild temperature.

While the rainy season typically runs from late November through April, so expect some rainfall and cloudy mornings around the bay.

Getting Around in San Francisco

Getting Around in San Francisco
Getting around in San Francisco with public transportation

When visiting San Francisco you’re going to be moving all around the city as you sightsee. This means that it’s in your best interest to know your options for getting around in the city. While San Francisco is pretty compact, it is still too big and not easy for visitors if they choose to walk to visit all the major attractions.

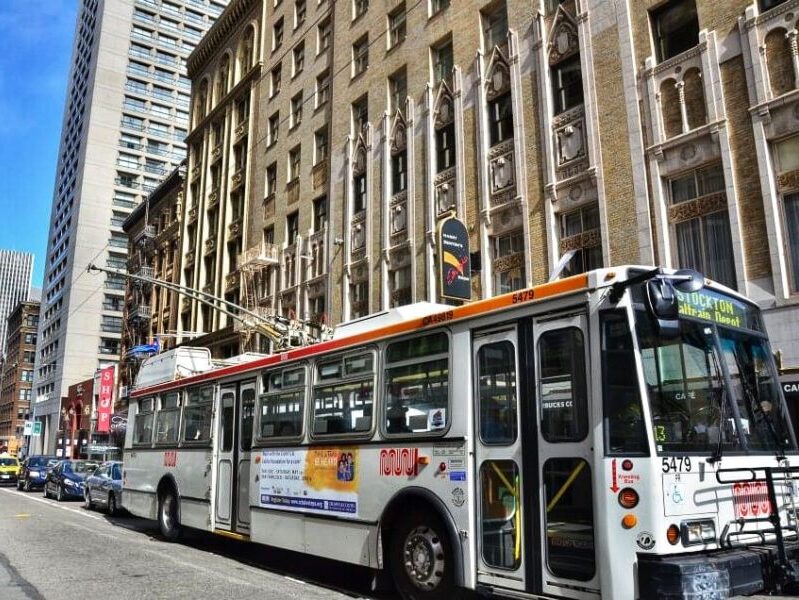
Public transportation in San Francisco runs on the BART and Muni system. BART includes the underground subway system and MUNI includes streetcars, cable cars, and buses. As a visitor, mostly you will use Muni for getting around in the city. You can rely on San Francisco’s public transport network, and mix with walking and Lyft or Uber for your visit to SF.

You can also take the San Francisco Hop-On Hop-Off Bus Tour as it includes all the major stops at San Francisco’s must-see attractions such as Union Square, Fisherman’s Wharf, and Pier 39.

Driving in San Francisco

Driving in San Francisco is a great option as it is more flexible and convenient. But you will need to be extra careful. San Francisco is a hilly city and some roads are small and hilly. It can be challenging and difficult to drive with steep hills and slopes. Besides, parking is limited and you will need to be patient when looking for a parking lot especially when getting to the popular attraction.

We rented a car and drove to San Francisco as part of our California East Coast trip. We always use Rentalcars.com as it always offers the best rental car prices and is reliable  – Check Prices Now!

Best Place To Stay

The best place to stay in San Francisco is Union Square. We believe Union Square is the most convenient location to stay in San Francisco, especially for a relatively shorter trip. It is a great base for exploring the city and is perfectly linked with public transportation. It also has the best selection of accommodation, from luxury to budget options.

Below we share some of the best options to help you decide what works best for you.

Mid-RangeHandlery Union Square Hotel is a very nice hotel, as central as possible. It has a perfect location, with a 5-minute walk from the Powell Street cable car line. The rooms are classically designed and very clean.

Mid-RangeThe Chancellor Hotel on Union Square is one of our favorite picks for staying in San Francisco. It is located just half a block away from union square and within walking distance of the Powell Street cable car line. There is a wide range of room types, from single rooms to family suites for your stay in San Francisco. Prices are in the mid-range for the quality of the accommodation.

Luxury: Hotel Nikko San Francisco combines a modern, trendy, and comfortable interior with an outstanding location for your trip to San Francisco. It offers good facilities like a gym, pool, and spa for hotel guests. Upscale toiletries and rainfall showers are a lovely bonus and the room rate includes breakfast. Located within walking distance of bustling Union Square. Also, directly opposite the hotel is a stop for the hop-on and hop-off bus.

3 Days in San Francisco

Here is the suggested San Francisco itinerary, and how I’d fit everything in 3 days. You can follow this exactly, or use it as inspiration.

Day 1 in San Francisco Itinerary:

  • View on Golden Gate Bridge (1-2 hours)
  • Walking over the Golden Gate Bridge from Welcome Center (1 hour)
  • Visit the Palace of Fine Arts (2 hours)
  • Half-Day Tour to Alcatraz (3-4 hours)

Day 2 in San Francisco Itinerary:

  • Ride The Iconic Cable Car (1-2 hours)
  • Union Square (1-2 hours)
  • San Francisco’s Chinatown (2-3 hours)
  • Lombard Street (1 hour)
  • Wandering at Fisherman’s Wharf (2-3 hours)
  • Watch the sea lions at Pier 39 (1 hour)

Day 3 in San Francisco Itinerary:

  • Take the scenic route along iconic Highway 1.

DAY 1: San Francisco Itinerary

Golden Gate Bridge

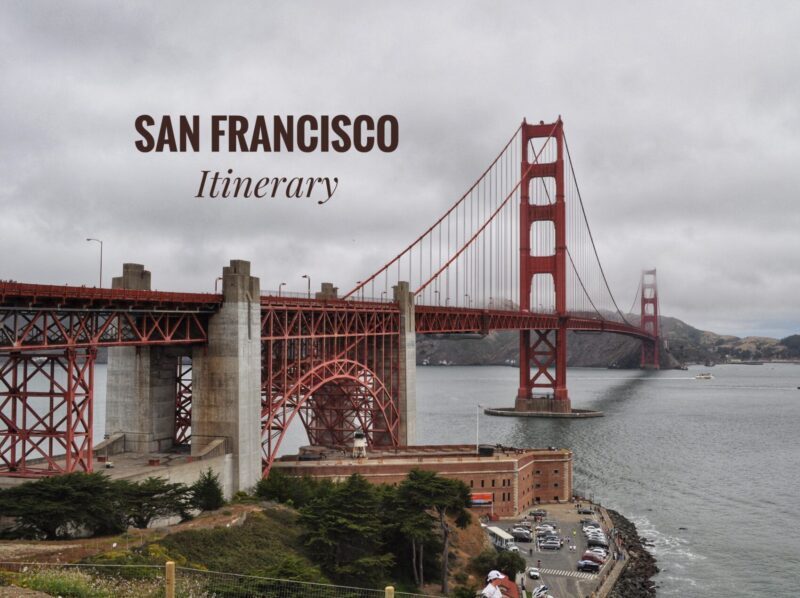
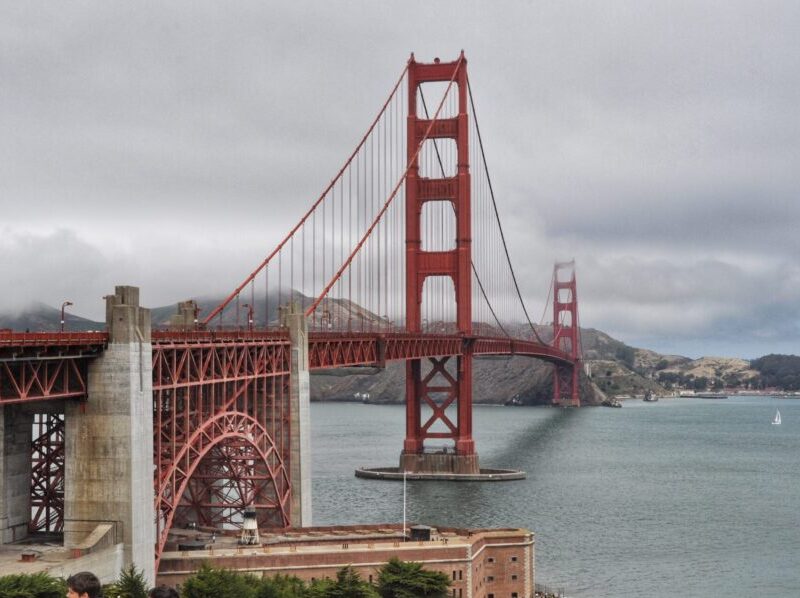
No trip to San Francisco is complete without seeing the Golden Gate Bridge. We recommended kicking start your 3 days San Francisco itinerary with one of the city’s most iconic sights. This 1.7-mile red suspension bridge spans the Golden Gate strait in California and connects San Francisco Bay with the Pacific Ocean.

Golden Gate Bridge is an engineering marvel that draws your eye no matter where you view it from. The bridge can be enjoyed from many points throughout San Francisco and Marin County. No matter where you stand, this iconic bridge is one of the most beautiful and awe-inspiring sites in San Francisco.

Battery Spacer East Trail – Best View of Golden Gate Bridge

Best View of Golden Gate Bridge

For a first-time visitor to San Francisco, the best way to experience the Golden Gate Bridge is to head to Battery Spacer. It is a great spot to view the Golden Gate where you can have a stunning view of the bridge stretching far into the distance.

We arrived there in the late morning but it was cloudy and the fog obscured the view of the top of the bridge. The parking lot is almost full, so come early.

Several bicycles and footpaths run along the east side of the bridge at different levels, making it a pleasant stroll. We enjoyed the great view while strolling from the Battery East Trail to the Visitor Center.

San Francisco Travel Guide Tips: Parking is extremely limited and tricky. We parked at the East Battery Parking Lot where the Parking fee is $1.20/hour or $7.00 for all-day from 10:00 to 17:00. Be sure not to leave any valuable items in your car.

Golden Gate Bridge Welcome Center

View on Golden Gate Bridge from Welcome Center

From Battery East Trail, it took us only a 3-minute walk to the Golden Gate Bridge Welcome Center.

The Welcome Center offers merchandise and historical information. This is where you can learn information about the history, architecture, and construction of the bridge. You can also buy souvenirs including postcards, t-shirts, magnets, and wonderful collections about Golden Gate Bridge. Some of them which are worth considering buying.

Besides, this welcome center is also the starting point on the Southeastern end for pedestrians walking over the bridge. You can choose to walk the bridge to admire it up close.

It is an easy walk to different good vantage points of the bridge. The bridge is about 2 miles long but you can walk as far as you want. We took multiple photoshoots and enjoyed the stunning close-up view of the Golden Gate Bridge!

Expected to spend 2-3 hours exploring the Golden Gate Bridge

Palace of Fine Arts

San Francisco Itinerary - Palace of Fine Arts

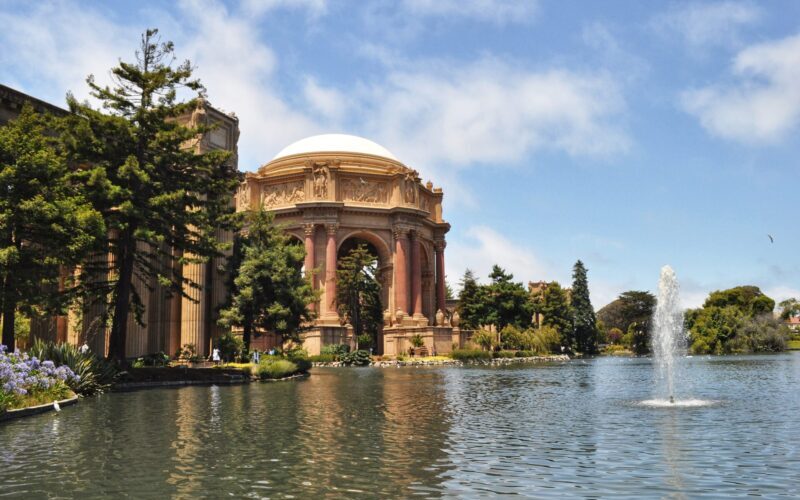
If you find yourself in the city and you have some time to wander, be sure to stop at the Palace of Fine Arts in the Marina district of San Francisco. It is an iconic site visible from many parts of the bay area and well worth your time to visit this beautiful location.

The Palace of the Fine Arts was built in 1915 for the Panama Pacific Exposition in order to exhibit works of art presented there. You’ll find a classic Roman structure complete with rows of Corinthian columns, ornamental urns, friezes, and carved decorations. It is one of the most beautiful spots in the city and popular with both tourists and locals. The gorgeous work of architecture and building make for amazing photos, especially when you have nice weather.

We spent some time walking through the palace garden admiring the beautiful craftsmanship. Walking around looking up at the massive architecture and archways is breathtaking. The gardens, the lagoon, the fountains, and the trees are all so peaceful. It took us about an hour to explore it from all sides.

Half-Day Tour to Alcatraz

Visiting Alcatraz

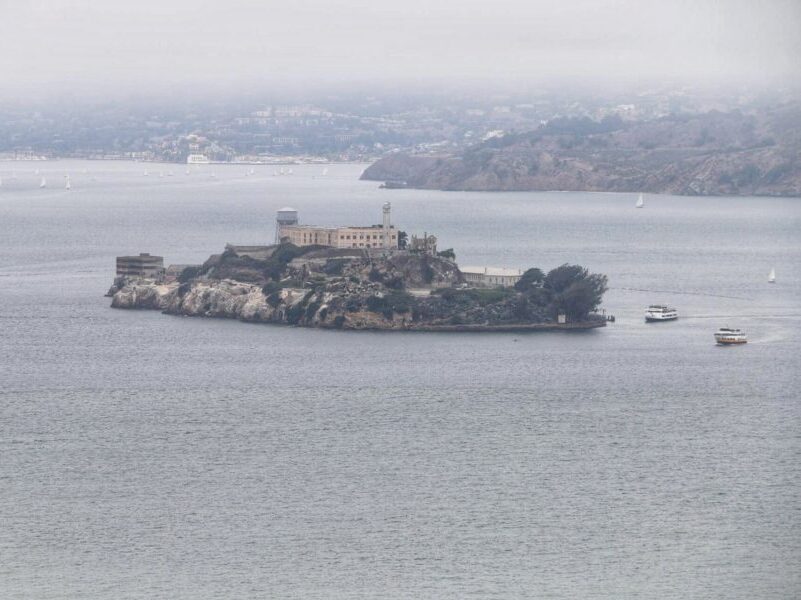
Located on a lonely island in the middle of the San Francisco Bay, Alcatraz is a popular quirky tourism attraction in San Francisco. This former prison is the most famous federal high-security prison and home to some of the worst criminals in the US. Famous inmates were al Capone, machine gun kelly, the birdman of Alcatraz, and Mickey Cohen. It was shut down in the 1970s and has since become a national landmark people can explore.

The trip to Alcatraz was the first time we get up close to the prison in the USA. The place is full of history, stories, facts, and interesting information. The audio guide is included and it is very detailed. It’s very interesting to be there on a ferry and see the Prison.

Visiting Alcatraz is also a half-day activity and we spent almost 3 hours wandering the island. There’s so much to see and do, it’s a place to spend a half-day trip. You can take a ferry from the Embarcadero to Alcatraz and spend time exploring the cell blocks and grounds.

San Francisco Travel Guide Tips: Our Alzatraz ticket was booked last minute at the San Franciso and it is likely to sell out for the day we joined. Make sure to get your tickets early before your visit because this is an extremely popular attraction. We recommended booking the Alcatraz Tour a few weeks ahead of your trip. You may consider coupling it with the San Franciso Grand City Tour from Viator with a high reputation among customers.

Check the tour informationAlcatraz Island and San Francisco Grand City Tour

DAY 2: San Francisco Itinerary

Ride the Iconic Cable Car

Ride the Iconic Cable Car in San Francisco Itinerary

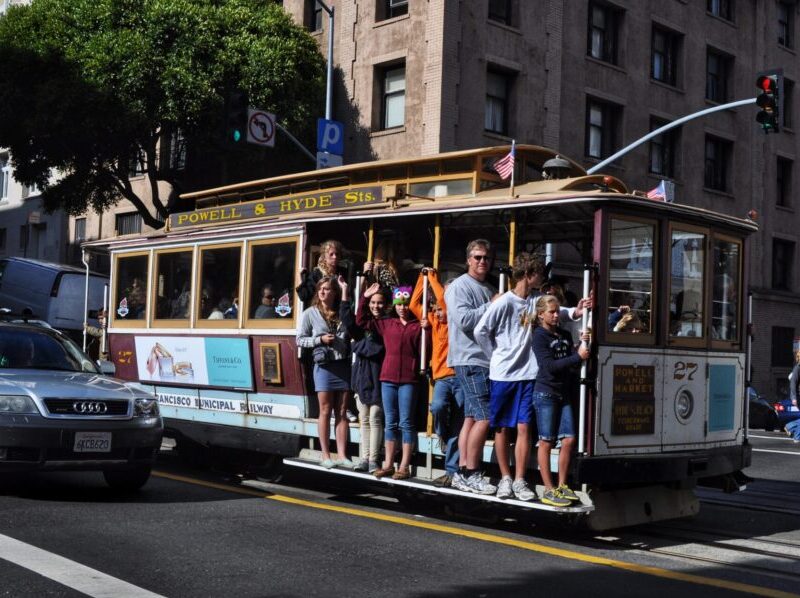
With San Francisco full of hills and valleys, the ride on the cable cars presents amazing vistas. Nothing is more recognizable than the iconic Cable Cars and every visitor should take a ride on the city’s famous Cable Cars. It is a great way to get around the city and take in the experience.

The San Francisco Cable Car has three routes:

  • California Line (Red Line) provides a great downtown view and Grace Cathedral.
  • Powell-Hyde Line (Blue line) goes through Union Square, Chinatown, Lombard Street, and Fisherman’s Wharf.
  • Powell-Mason Line (Green line) goes through Union Squares, Chinatown, Nob Hill, Cable Museum, and Fisherman’s Wharf.
Popular San Fran Cable Car Powell Hyde Line

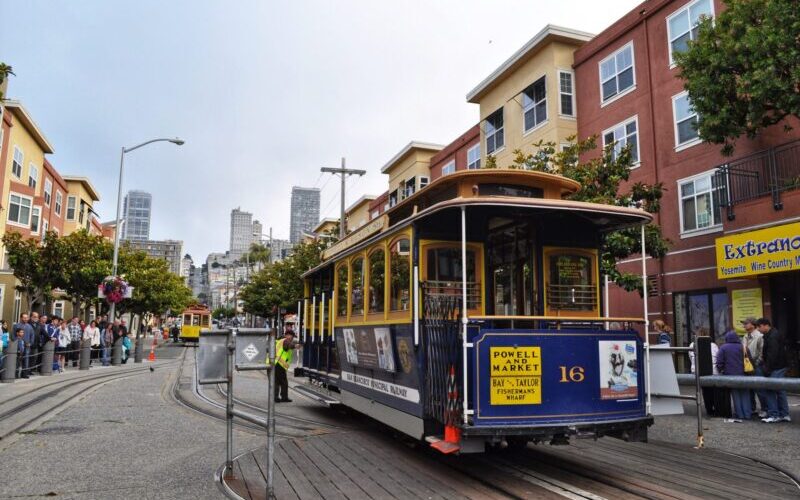
The most popular San Fran Cable Car route is hopping on the Powell Hyde Line from Powell & Market station, which goes through Russian Hill, Lombard Street, with the final descent opening to a grand view of the bay to Fisherman’s Wharf.

At $8 a ride, it’s probably not the most economical transport in San Fran. But you can download the Muni apps and buy a day ticket for $13 or 3 days for $31. Make two trips minimum each day (there and back) and you make money as well have a thrill.

Riding Journey with Cable Car

San Francisco Cable Car

As a visitor to San Francisco, we decided for getting around in San Francisco using the cable car on our second day in San Francisco itinerary. But you opt to experience the cable car for a single trip to experience this most exciting city.

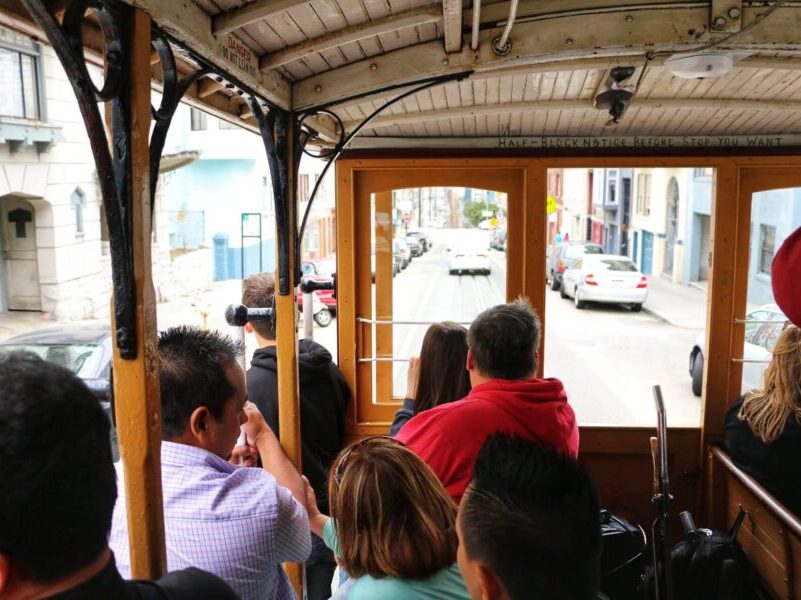
The cable car is controlled in a masterly manner. But it can dangerous, especially most people enjoy hanging off the side of the cable car. Prepare for a bumpy hilly ride when inside the cable car along the journey. We enjoyed our riding journey with the San Francisco Cable Car. You can feel the enthusiasm when the moment you queued up until you finish the ride. Strongly recommended!

San Francisco Travel Tips: The queues get super long for the cable car ride. So try to go as early as possible. And if you want to take the perfect photo with the iconic cable car, there are some empty cable cars parked at Francisco & Taylor (near Fisherman’s Wharf). You can hop on for free and get the shot from as many angles as you’d like!

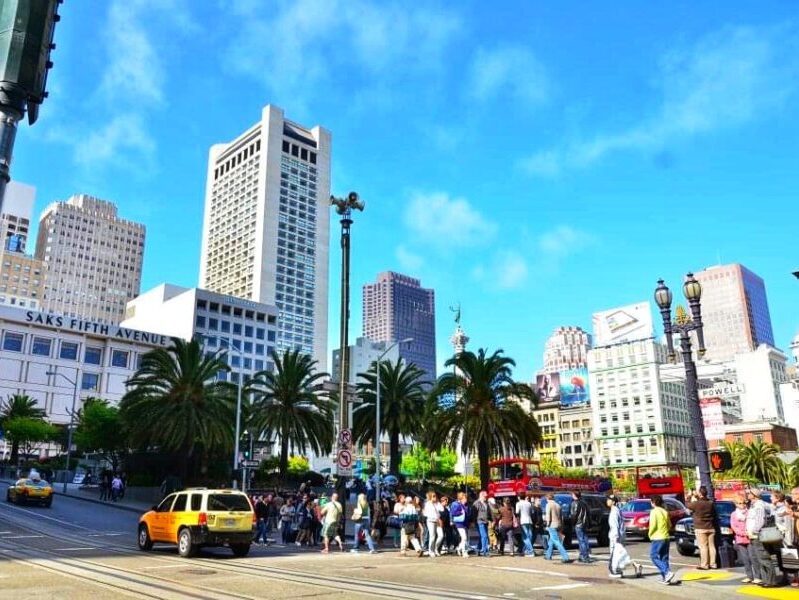
Union Square

Union Square in San Francisco

The bustling Union Square is the center point for San Francisco’s theater and shopping district and is always busy with locals and tourists. The surrounding area has department stores such as Macy’s and Neiman Marcus, boutiques, art galleries, restaurants, bars, hotels, and much more.

You can go shopping and dine in Union Square. Or you can also enjoy soaking in the sunshine; watching people come and go or just grabbing a cup of coffee sitting down and relaxing.

Union Square is also the transportation hub for San Francisco. The San Francisco cable car (Powell Mason & Powell Hyde) is a couple of minutes’ walk from here. Besides, you can also consider taking the Hop on Hop off sightseeing bus that embarks from Union Square. 

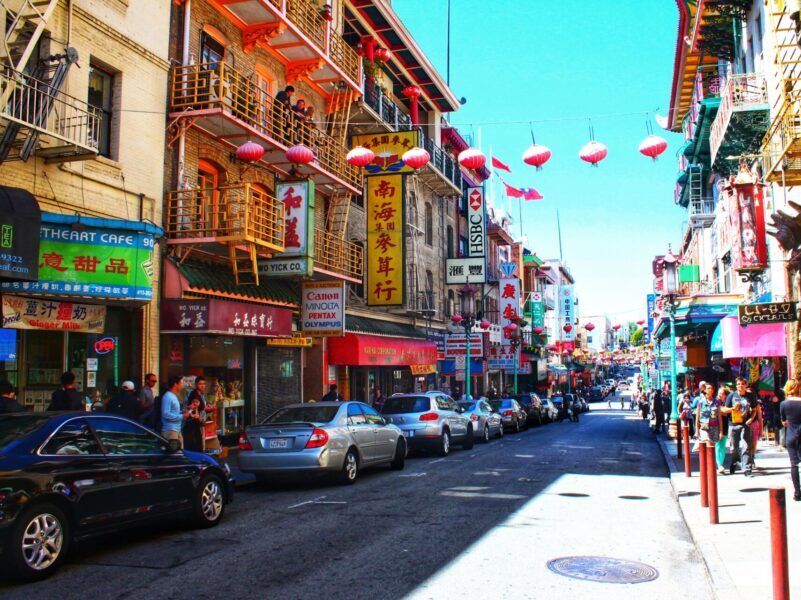
San Francisco Chinatown

San Francisco Chinatown

Every visitor to San Francisco should visit Chinatown. Located near the financial district downtown, Chinatown is the most densely populated area in the entire U.S, mostly the Chinese community. You will find all sorts of Chinese restaurants, bakeries, cafes, food stands, and shops. It is always busy with people doing their daily business, shopping for food, socializing, and meeting friends.

We then headed to Chinatown from Union Square. In this historical neighborhood, we walked past the first fortune cookie factory and went to the oldest temple, Tin How Temple. It’s fun strolling along the streets and stopping by any shop that catches your attention.

Don’t forget to check out the Golden Gate Fortune Cookie Factory to watch them hand-make fortune cookies. You can also take the sample to try your fortune!

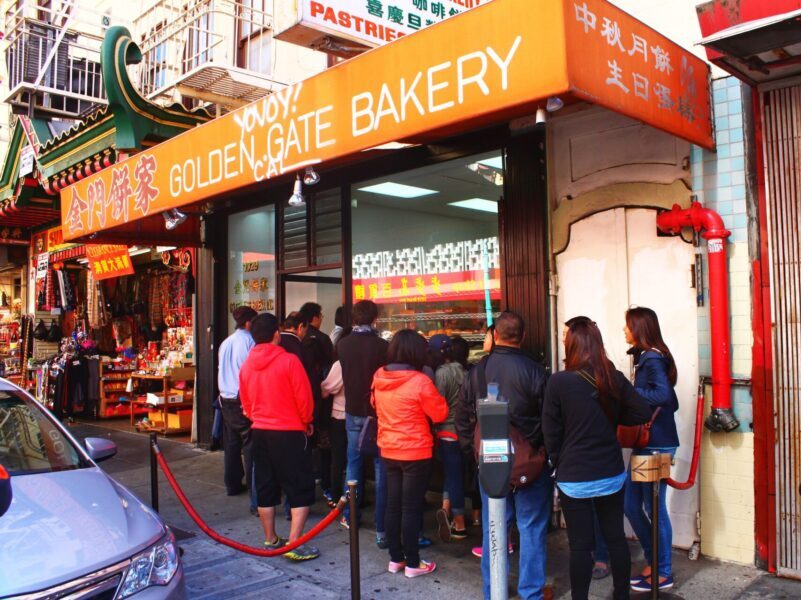
Golden Gate Bakery in San Francisco Chinatown

Most people who visit Chinatown come here in search of great eats. Many eateries are excelling at dumplings, pork buns, Peking duck, dim sum, and many more delicious cuisines. The most crowded and popular eatery is the Golden Gate Bakery. Their Hong Kong’s style egg custard tart is a sweet, creamy pastry that often gets sold out within hours of opening the bakery.

We enjoy strolling down Grant Street, shopping for local products, or picking up some souvenirs. Besides, we also had dim sum for our lunch at Chinatown.

It’s impossible not visiting Chinatown in 3 days in San Francisco. There are many interesting things to see and worth exploring. It is an experience not to miss, so make sure you add a visit to your San Francisco itinerary.

Lombard Street

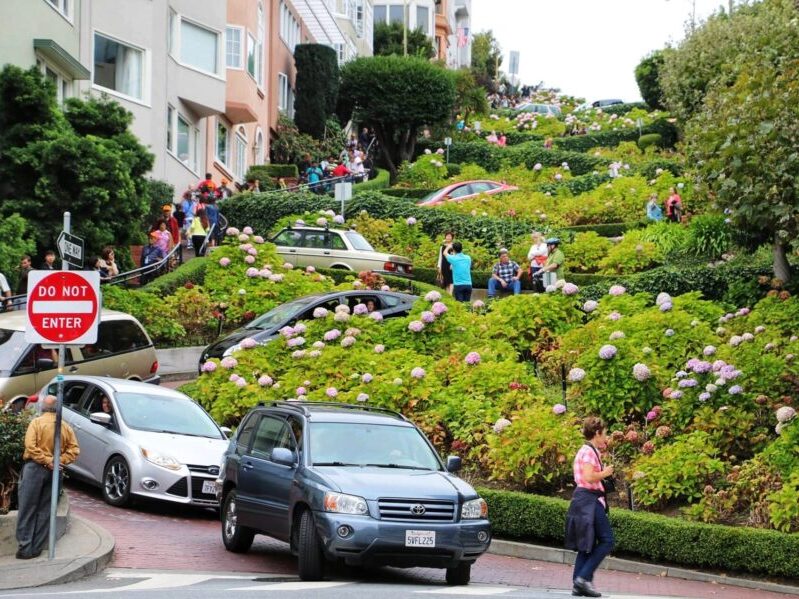
Lombard Street
The famous Lombard Street

The “most crooked” Lombard Street is one of the popular to-dos lists in any of the San Francisco itineraries. It’s the famous street with 8 zigzag sharp turns but with its 27 degrees angle. Many visitors flock to Lombard Street and drive down this windy street. There is always a big crowd, both driving and walking. 

In fact, Lombard Street is not the most crooked street in the country. But the people that live on this road of go out of their way to make it beautiful especially in the spring. The steepness of the windy cobbled street is fantastic to see when visiting.

Driving down this winding street on a hillside is great fun. It is a fun experience for the first-timer to drive down the hill. But even if you are not driving, watching from the bottom from some of these longer cars that try to attempt the drive down is fun! We were amazed to see cars driving down this beautiful one-way street, lined with stunning flower beds with its 8 unique hairpin bends. It was spectacular and unique!

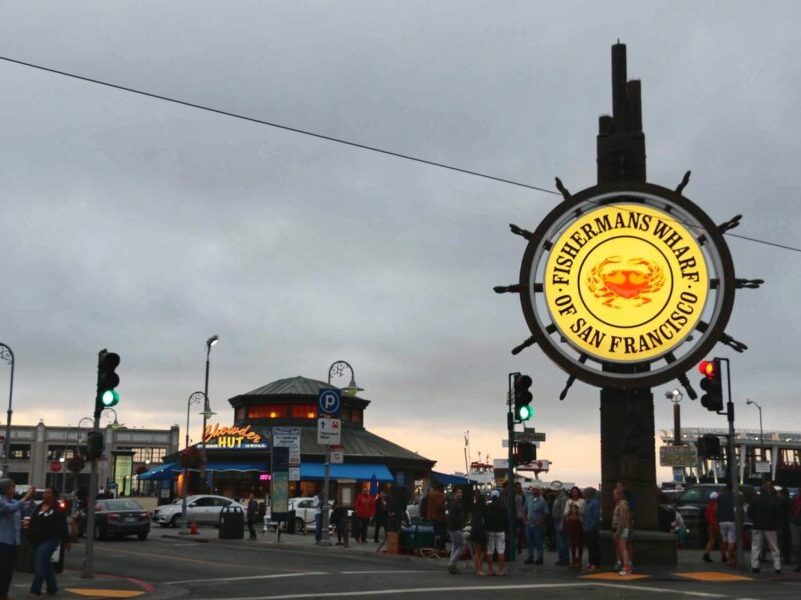
Fisherman’s Wharf

Fisherman’s Wharf - San Francisco Must-Visit
Fisherman’s Wharf – San Francisco Must-Visit

The Fisherman’s Wharf is another must-visit in the San Francisco itinerary. Almost all people will visit this popular waterfront attraction on any given trip to San Francisco. It is always had excitement no matter what hour you visited. There are lots of shops, restaurants, marinas, entertainment, and museums. It is always busy and crowded with tourists and locals.

Besides, Fisherman’s Wharf is also where the tours leave for Alcatraz, along with other bay ferries for sightseeing or specific destinations on the bay.

Eating Clam chowder at Fisherman’s Wharf

Come to Fisherman’s Wharf if you are looking for what to eat in San Francisco. There are plenty of dining options, from street foods to varying quality seafood. You must have the Clam chowder in a sourdough bowl of bread. It is very tasty and filling. San Francisco must-try food!

It’s worth a visit to Fisherman’s Wharf just to get the tourist experience in San Francisco.

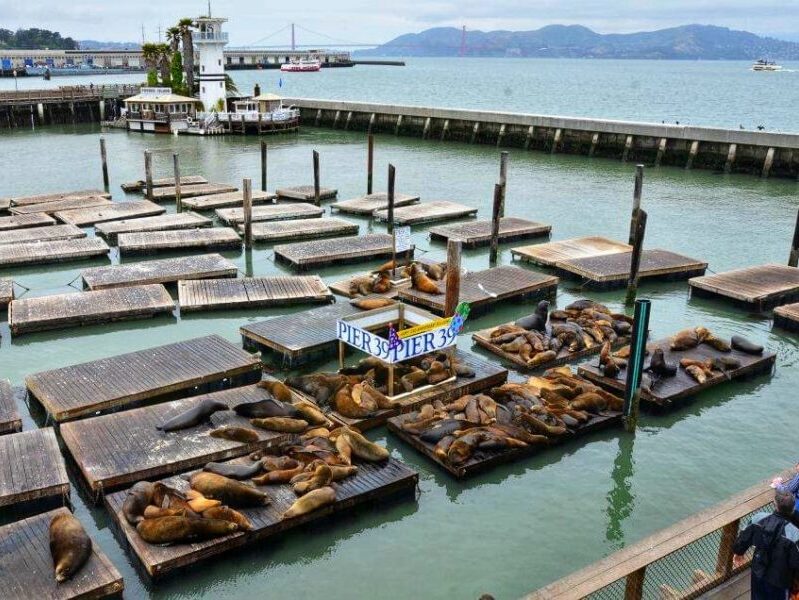
Pier 39

Sea Lions at Pier 39 - San Francisco travel blog
Sea Lions at Pier 39

A day of shopping and watching the sunset is always a great activity at Pier 39. It is an attractive place to wander, with a fantastic view and great atmosphere. Once you’ve walked here, you can stroll down the street lined with more stores and restaurants. There are a few pretty good street performers.

But the fun is in watching the protected seals that have taken over a big chunk of the pier. You’ll spot a huge group of sea lions on the docks which have been living at Pier 39 for decades. It is also one of my favorite things to do in San Francisco.

We all fall in love when watching the sea lions hang out, swim, bark, and play around the dock. It is so wonderful to see them so close. Don’t feed them and they’re protected!

DAY 3: San Francisco Itinerary

On the last day of your San Francisco itinerary, I recommend getting out of the city and heading for a scenic road trip or wine tasting in Napa Valley.

Scenic Route along Highway 1

Napa Valley is California’s most famous wine region. It is also one of the most popular day trip destinations from San Francisco with a relatively easy 60-90 minute drive north from the city. You could easily take a day trip to this wine country to sip on some of the best wines in the world. If you don’t have a car, you can also join the tour departed from the city to explore some of the best wines in California.

Tour Recommend: Napa Valley and Sonoma Full Day Wine Tour from San Francisco

California Highway 1

Another worth recommendation is iconic California’s Highway 1 for a scenic Pacific Coast Highway road trip. Named one of America’s most scenic drives, the route from San Francisco to Big Sur is the most scenic stretch of the Pacific Coast Highway.

The road trip has many vista points with great views and attractions along the way. You will see rugged coastal, majestic views, unique hikes, and unforgettable beaches along the journey.

Pacific Coast Highway Road Trip

We started from San Francisco, drive south to Big Sur, and ended in Los Angeles. It was a long driving journey but definitely worth it. We documented our Pacific Coast Highway Road Trip from San Francisco to Big Sur. Feel free to take a look if you are planning for a scenic Highway 1 route.

Further Read: Big Sur Itinerary: Highway 1 Road Trip Travel Guide Blog

More San Francisco Travel Tips

San Francisco Travel Tips
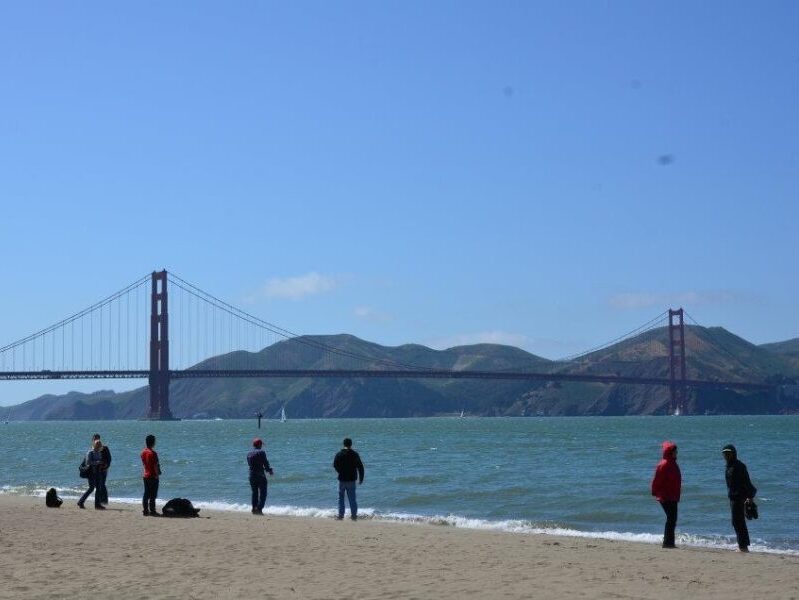
Golden Gate view from Baker Beach

Here are the San Francisco travel tips to help you make the most of your travel time in the city:

  1. Know the weather before you’re out. The wind and frog keep SF weather on the chilly side. We recommended dressing in layers with a windbreaker or hoodie to protect from strong wind.
  2. Wear comfortable shoes. San Francisco is a city for walkers, and you’re going to be doing a lot of hill climbing during your visit.
  3. The Golden Gate is amazing and you can view it from a different perspective other than the popular vantage point. We love the Golden Gate view from Baker Beach!
  4. If you plan to tour Alcatraz Island, remember to make reservations for at least two weeks ahead. The tour is extremely popular and fills up fast!
  5. Parking is notoriously bad in San Francisco. The parking fee is expensive and very limited.
  6. Lyft share rides or Uber are convenient and budget-friendly. If you’re taking this, you’ll no need to worry about the outrageous parking fee in the city.
  7. Car break-ins are quite common, especially in touristy areas. Be sure to leave NOTHING valuable in your car.

Overview: Planning For San Francisco Itinerary

There you have it – the San Francisco itinerary for 3 days! You should now see the iconic Golden Gate, natural scenery, a bustling downtown, unique prison tours, and so much more. There’s certainly a lot more to do in San Francisco than I could ever fit into a few days of the visit. Use this suggested San Francisco itinerary as your starting point and see where your trip takes you. I promise it won’t disappoint!

Are you planning a trip to San Francisco or other interesting places in California? Feel free to read more on our California travel guide blog posts below:

Travel in Arizona:
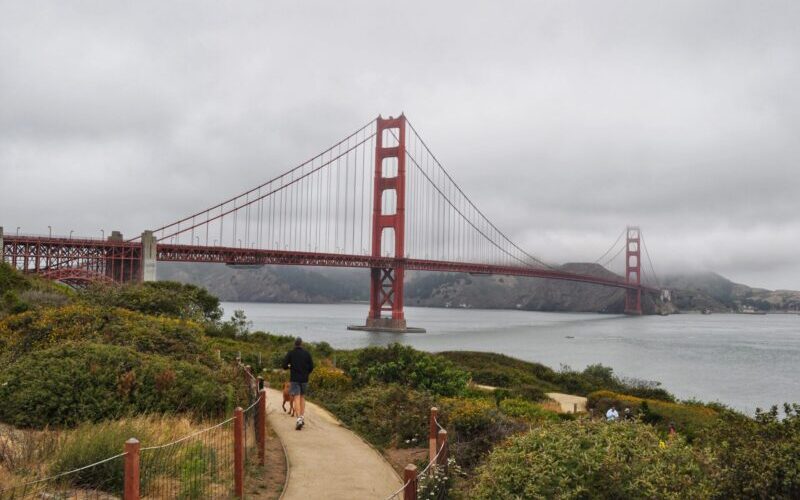
Antelope Canyon Travel Guide

Day Trip To Antelope Canyon: A Travel Guide Blog
posted in: United States | 0

Last updated on December 22nd, 2024

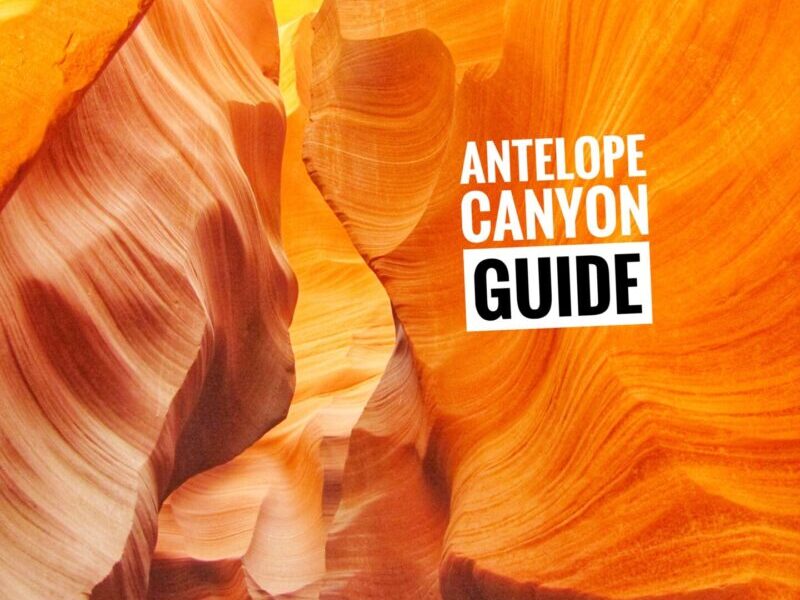
Planning a trip to Antelope Canyon to immerse in the beauty of Mother Nature? This magical place is simply spectacular, and no picture of it can truly do it justice. Keep reading for some tips and facts I learned from our Antelope Canyon travel guide blog!

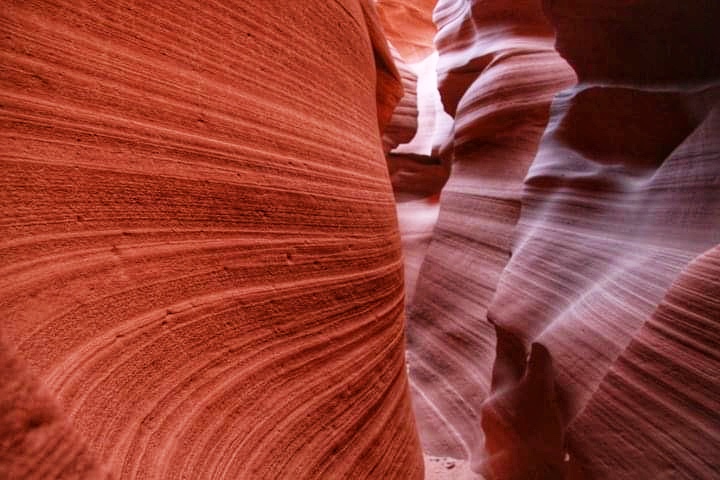
Just a few miles south and east of Page, Arizona (AZ) is Antelope Canyon. The narrow canyon is one of the most beautiful slot canyons in the world and simply something you can not find anywhere else. Marvel at the natural curves and swirling colors of this sandstone sculpture. The colors, the formation of the rocks, and the scenery are incredibly beautiful that words will not do it justice. You simply have to be here and immerse yourself in the atmosphere.

For years, I’ve been seeing pictures of Antelope Canyon. This magical place carved out by Mother Nature is the main reason I visited Page. I still can remember the moment I walked through the curvy orange walls with the light beams that shine down between them. It was incredibly amazing and I can’t believe that I was able to see it with my own eyes. You will never forget this amazing Mother Nature works for visiting Antelope Canyon.

However, visiting Antelope Canyon isn’t as simple and easy. There is something you need to know before your trip. In this Antelope Canyon Travel Guide blog article, we’ll tell you everything you need to know so that you can prepare for and make the most of your trip to Antelope Canyon.

Antelope Canyon, AZ

Antelope Canyon

Antelope Canyon is located 10 minutes east of Page near the Arizona-Utah border. It is always ranked as the “10 most beautiful places on earth”, “10 most surreal destinations” or “50 most unique landscapes” in many travel guides or blogs. Its otherworldly beauty makes it one of the most highly sought-after destinations in the world. The slot canyon is a popular spot for hikers, photographers, and nature-lovers from around the world.

But, can you imagine that Antelope Canyon was created by flash floods millions of years ago? It is unbelievable to the eyes when you look at these giant stonewalls that are mostly carved by Sand in flash floodwaters and then polished by sand particles in the wind. The glowing red walls and narrow, twisting passageways are the marvels of nature’s timeless actions and cycles that repeated over 1000s of years of erosion.

When walking on the wall of these fantastic slot canyons. You can feel the power of Mother Nature. That’s an almost unbelievable combination of cause and effect. But time is the factor that makes that cause-effect work.

Things To Know Before Visit

To ease your time and effort, we have put together this quick and easy information in this session of Antelope Canyon Travel Guide here.

What is the best time to visit Antelope Canyon?

The best time to visit Antelope Canyon is from March through October when the light shafts appear. Crowds will be at their peak then, which may make it difficult to snap that perfect shot.

What is the opening time for Antelope Canyon?

Antelope Canyon is open year-round. However, it may close during days of heavy rain or snow, but is uncommon to happen.

How much for a tour to visit Antelope Canyon?

The entrance fee is more at Upper Antelope Canyon compared with Lower Antelope Canyon. It generally costs you around $70 to $90 for upper Antelope Canyon and $40 – $60 for lower Antelope Canyon.

Should You Visit Upper or Lower Antelope Canyon

If you are looking for great photo opportunities, visit the Upper Antelope Canyon as it is more photogenic. Lower Antelope Canyon is more fun and adventurous. It is much tighter inside and required walking up/down and even climbing on the ladder.

What is the prime time for capturing the best photo of Antelope Canyon?

The best photo where the slim ray of light beam shot right to the ground in Antelope Canyon is between 10:00 to 12:00 at Upper Antelope Canyon. This time slot is very popular and more expensive. But you’ll get higher chances to capture this priceless photo.

Is the Antelope Canyon worth visiting?

The canyon is absolutely worth a visit! There are no words to describe the breathtaking beauty of the Antelope canyon. You’ll see the most beautiful landscape and all the stunning colors in the Antelope canyon.

Guided Tour To Antelope Canyon

Guided Tour to Lower Antelope Canyon

Antelope Canyon is located on private land within the Navajo Nation. You’ll need a native Navajo guide to visit Antelope Canyon, no matter if you’re visiting the Upper or Lower Antelope Canyon. You can’t venture into the canyon on your own and can only access it via an authorized guide. Additionally, a permit is also required, but it is usually covered in your guide’s fee. (Check with your tour company if you have any questions about additional fees.)

There are plenty of authorized tour companies that will take you into the canyons. All the tours offer a similar experience and prices.

  • Lower Antelope Canyon Tour -Two companies are running for lower Antelope Canyon: Ken’s Tour and Dixie Ellis. Book the tour here: Lower Antelope Canyon Tour
  • Upper Antelope Canyon Tour – Four companies are running for upper Antelope Canyon: Adventurous Antelope Canyon Tours, Antelope Canyon Tours, Antelope Canyon Navajo Tours, and Antelope Slot Canyon Tour. Book the tour here: Upper Antelope Canyon Tour

Reservation is suggested since tours can sell out weeks in advance. The price may seem steep but you will think it is a bargain once you begin your tour.

Alternatively, you can also join the Antelope Canyon Tour from Las Vegas. It is a popular tour with pick up from Las Vegas to the canyon. It will also include a stop at the Horseshoe Bend, where you can take snaps of the Colorado River as it loops back on its course to form a dramatic U-shaped curve.

Upper or Lower Antelope Canyon

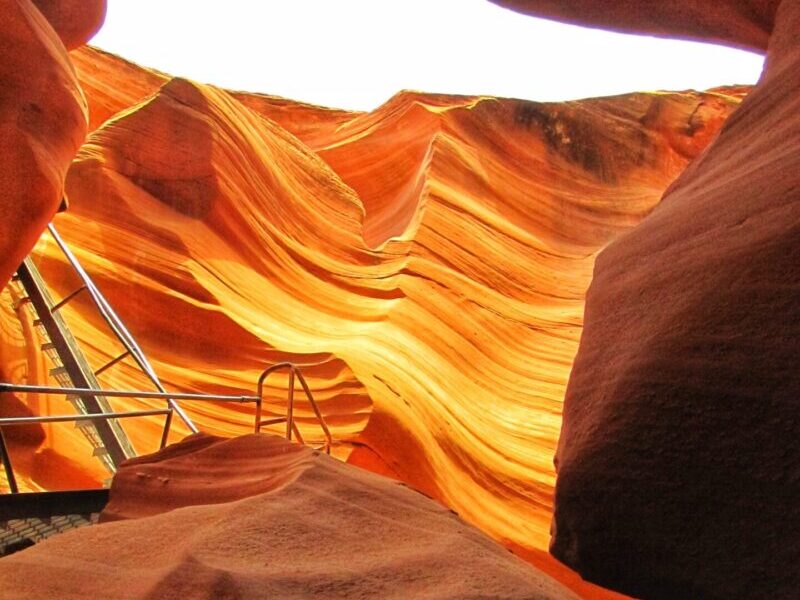
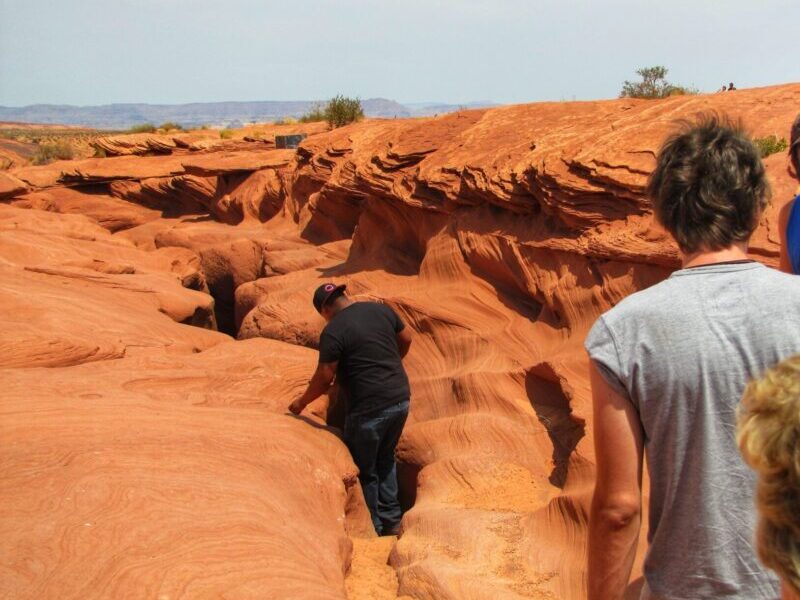
Lower Antelope Canyon with ladder

If you’re studying any Antelope Canyon Travel guide or blog posts, you’ll know there are two different sections that you can visit: Upper Antelope Canyon and Lower Antelope Canyon. These two points are mere 7.5 miles apart and both are equally beautiful. It is hard to say which is better. But, do you know which one to choose and what is the difference?

If you are looking for great photo opportunities, then the Upper Antelope Canyon is the more popular route compared with Lower Antelope Canyon. Most of the Antelope Canyon photos are from here, and it is the best place to capture the famous corkscrew swirls and twists. The canyon shape is wider at the bottom and narrow at the top. It is at ground level with less than a 2% incline, so it is easier to walk through. The sandstone walls can reach up to 120 feet with more sunlight entering the canyon.

If you are looking for a fun and adventurous experience, go for the Lower Canyon Canyon. The canyon shape is narrow at the bottom and wide open at the top. In your tour journey, you’ll need to squeeze through the narrow passageway and do some climbing. It is cheaper compared with upper Canyon but you can get a longer time in the canyon.

We went to Lower Antelope Canyon because it is more adventurous and costs slightly less. But, whichever you choose, remember to make your reservation. The Antelope Canyon is extremely popular in recent years. The popular time slots especially during the peak season are selling out a few months ago! Make your reservation in advance to avoid disappointment.

Where To Stay

Day Trip to Antelope Canyon

Many people opt to depart from Las Vegas (which required approximately 4 hours of drives to Antelope Canyon) or stay overnight nearby. Together with Grand Canyon and Horseshoe Bend, Antelope Canyon makes a perfect 2 days trip when visiting Arizona.

We recommended staying in Page if you plan to take the morning session of the Antelope Canyon Tour.

Best Western Plus At Lake Powell is a modern hotel, that offers spacious rooms and comfortable beds. Your stay comes with an American breakfast and a few places nearby to grab a bite. The location is great, especially if you’re planning to visit Antelope Canyon and Horseshoe bend.

Country Inn & Suites by Radisson Page is another great option. It is about 15km from Antelope Canyon, making it a good base for exploring the Antelope Canyon and its surroundings. The property is nice and clean with friendly staff. It also provides free parking for guests. Perfect for a short visit to Page.

Best Western View of Lake Powell Hotel is conveniently located if you’re visiting the Lower Antelope Canyon or the Horseshoe Bend. It is only 15 mins from the Antelope canyon tour, which was amazing. The room was a great size and the bed was comfortable. There was also breakfast provided, which had a great variety of hot and cold items. Free parking is also provided.

A Visit To Antelope Canyon

Visiting Lower Antelope Canyon

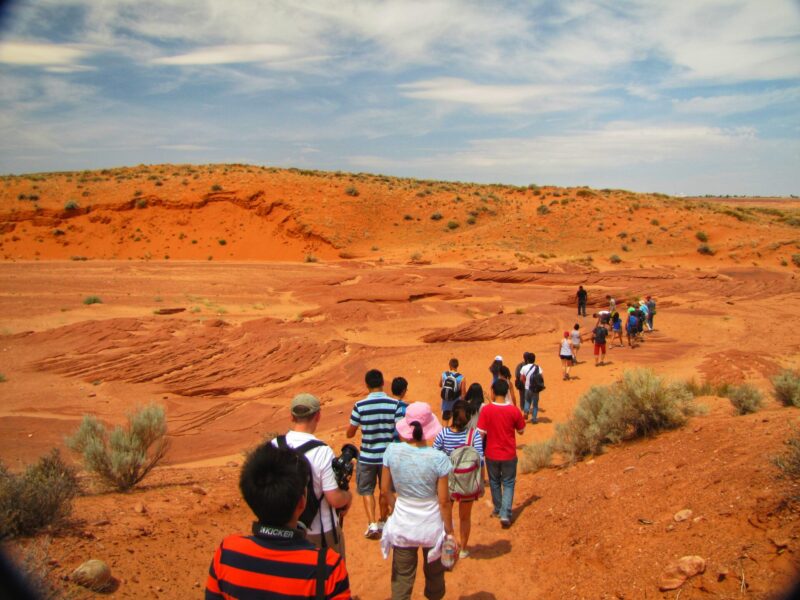
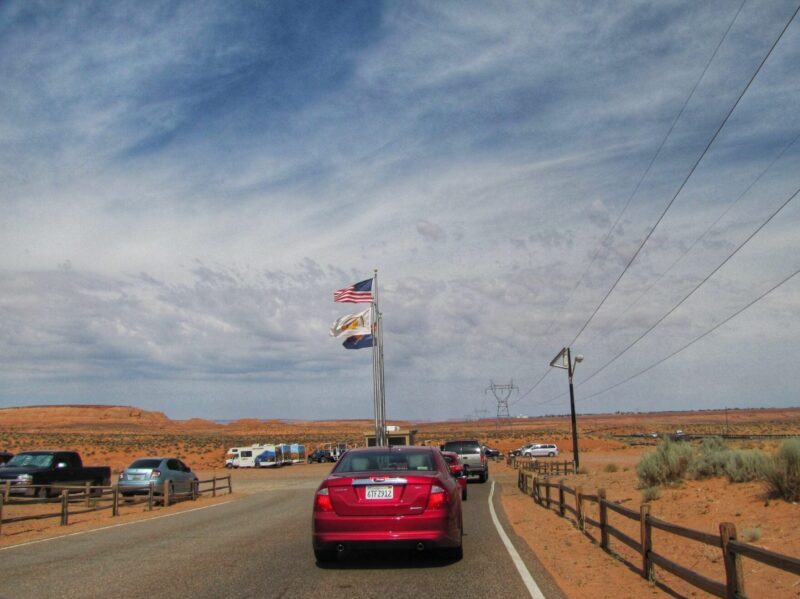
We went on a tour with Ken’s Tour to Lower Antelope Canyon as the available time slot is better suited to our Antelope Canyon itinerary. From Grand Canyon, we drove to Page and stayed one night in the town before getting to Lower Antelope Cayon.

We booked the morning tour, so the crowds were not too huge. But when we came out there were lines everywhere. So early is better for sure if you don’t want to wait in lines. Take note that even with a reservation, you might still have to wait 30 minutes or longer to enter the canyon. So plan your Antelope Canyon itinerary properly.

Stunning Beauty of Antelope Canyon

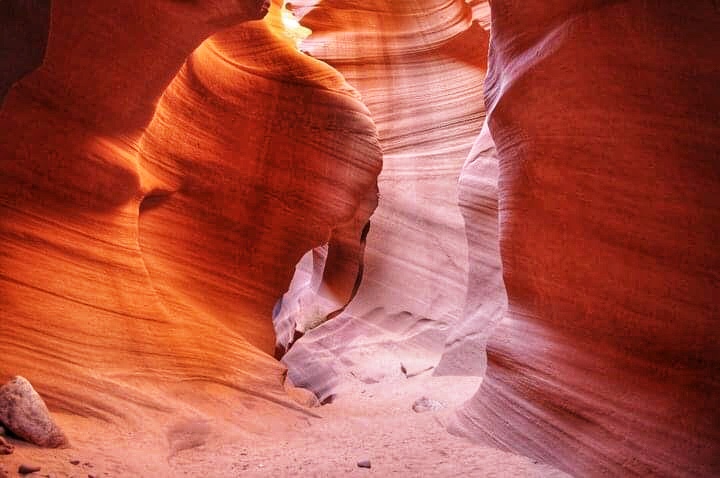
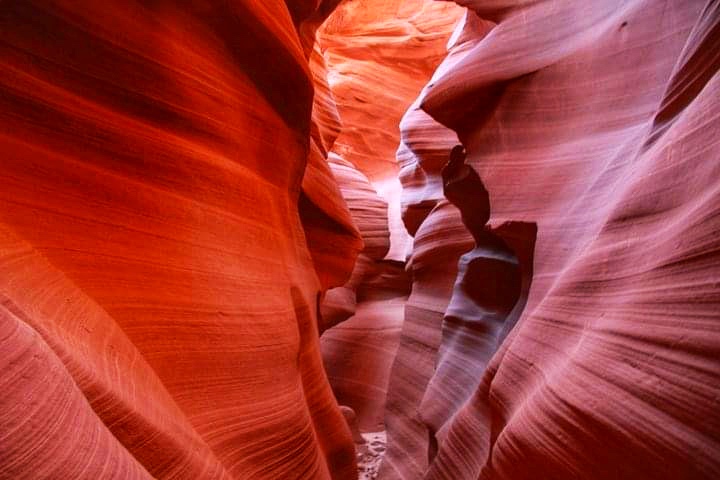
Our visit to Lower Antelope Canyon is during summer. It was pretty hot initially even in the morning and it does cool down when we’re inside. But what all the excitement is about is the stunning beauty of the canyon. We were all impressed and become breathless with its beauty. This place is beyond words or pictures and you have to see it in person.

Every few steps into Lower Antelope Canyon reveals a new, starkly beautiful scene created by Mother Nature. The beautiful natural sculptures change as the sun moves through the sky, so nothing you see is the same.

Touring in Lower Antelope Canyon

Our guide was very good and fantastic. He told us stories of growing up in the area and about Navajo beliefs. Besides, he also assists us how to capture some unique shots with angles in the canyon. We kept on snapping photo after photo! Every picture we took was a piece of art.

There are some pretty steep steps on the way down and a ladder involved. All were manageable and we found it was more adventurous and fun.

In total, the Antelope Canyon tour took us about an hour and a half. It was an amazing sight and I still can’t believe that I was able to see it with my own eyes! I would recommend anyone to experience this once in their lifetime.

More Antelope Canyon Travel Guide Tips

  • Be prepared for all the basics sunscreen, lip balm, sunglasses, or any other dust protection for the eyes when you are outside.
  • Bring good walking shoes, especially if visiting Lower Antelope Canyon. Also, bring a jacket as it is cool inside the canyon.
  • Check the weather before you go, as you walk down to a canyon that can be flooded in minutes when the rain comes. A sunny day is highly recommended to have enough sunlight passing into the canyon!
  • Both Upper Antelope Canyon and the Lower Antelope Canyon are beautiful in their own right.
  • Arrive at least 15 minutes early before the tour.
  • Try to stay in front or at the back because it gives you the greatest chances of amazing photos.
  • Be sure to toss some sand up into the air and the radiant light and colors are amazing.
  • There are no trash cans and no bathrooms in the canyon.
  • Tickets get sold out quickly! Remember to reserve the tour to avoid disappointment.

Overview: Antelope Canyon Travel Guide

Antelope Canyon Travel Blog

All in all, Antelope Canyon is one of the most majestic places that I have visited in the US. It’s truly magnificent and worth visiting for its unique, natural beauty. Do make a stop in Page to see the Antelope Canyons if you are in Arizona. You have to see it in person to get full appreciation and marvel at the beauty of mother nature. But please remember to reserve for the tour and be ready for the crowds.

For those who are wondering whether to go to the Upper or Lower Antelope Canyon, my advice will be to just go for the Lower Canyon. It is more fun and cheaper actually.

Have you ever visited Antelope Canyon? If so, how did you like it?